Utilizing the VirusTotal API to Query Files Uploaded to DShield Honeypot [Guest Diary]
[This is a Guest Diary by Keegan Hamlin, an ISC intern as part of the SANS.edu BACS program]
Part of the SANS undergraduate program is a 20-week internship with the SANS Internet Storm Center. During that time, interns are tasked with setting up a DShield sensor to act as a honeypot, capturing data and generating logs for SSH/Telnet, Firewall activity, Web requests, and most interesting to me, file uploads. With those logs, we are expected to create attack observations, explaining what vulnerability is being exploited, what the attacker is attempting to accomplish, and how to defend against this attack. I wanted to give myself a project to help aid with creating these attack observations, and in my case, a way to quickly get information on the uploaded files. At the beginning of the internship, I had given myself a personal goal, which was to do something to build my Python skills. I thought this might be the opportunity to do that.
VirusTotal is a go-to source to upload or search for hashes of suspicious files and it is what I typically use when investigating files uploaded to the honeypot. They offer an API to automate this process, and it integrates well with Python.
Simple Command Line Query
I began by following the steps listed in the VirusTotal quick start page for their Python integration tool vt-py. [1]
You can install this package in several way, but I simply used pip:
$ pip install vt-py
After playing around with the tool in a Python interactive session, I wrote a simple script that takes a file hash as a command line argument:
import vt
import sys
try:
file_hash = sys.argv[1]
except IndexError:
print("ERROR: You must supply a file hash.")
sys.exit(1)
# //// VIRUSTOTAL API KEY ////
API = # CHANGE THIS TO YOUR VIRUSTOTAL API KEY
client = vt.Client(API)
file = client.get_object(f"/files/{file_hash}")
analysis = file.last_analysis_stats
for x,y in analysis.items():
print(x.title(),":",y)
client.close()
The output looks like this:
$ python vt_simple.py 57e9955208af9bc1035bd7cd2f7da1db19ea73857bea664375855f693a6280d8
Malicious : 37
Suspicious : 0
Undetected : 22
Harmless : 0
Timeout : 0
Confirmed-Timeout : 0
Failure : 1
Type-Unsupported : 15
This doesn’t give a whole lot of information, however while investigating an attack, it is a quick way to check to see if a file has been analyzed and is being tracked as malicious.
I wanted more though. I wanted a way to automate submissions of all the files within the Cowrie /downloads directory and output in a format that would make it easy to quickly scan to determine which files might need further analysis.
Full Scan of Cowrie Downloads Directory
There were a couple of things I needed to keep in mind before writing this script. For one, the VirusTotal API has limitations on the frequency and number of queries for a free-tier account. Those are 4 lookups/min, 500/day, 15.5 K/month. There is no way that I would hit the daily or monthly limits, but I had to make sure the script didn’t perform more than 4 queries a minute. Easy enough to manage by adding a pause between each lookup. However, depending on the number of files in the download’s directory, this does mean that the script will take some time to complete the first time it is run.
Another aspect that I wanted to keep in mind was that I did not want the script to query files that it had already retrieved data on. There might be some spaghetti coding going on here, but to prevent that from happening, I had the script make a separate file_hashes.txt file that holds all the hashes that have been used to query VirusTotal already.
In the Cowrie download directory, all the filenames should already be the SHA256 hash of the file. In my case, there were a few that were not. I had already added a try/except block in my function that queries VirusTotal so that if a query fails, it won’t send an error to the console and end the program. To cover my bases and ensure that an actual file hash gets submitted, I added an if/else block to check if the filename is equal to 64 characters. This might not be the best way, but it makes it so that the program isn’t needlessly hashing each file, especially considering most of them are already renamed to the appropriate file hash.
This led me down a path to figure out how to hash a file in Python. In the Linux terminal, it’s easy as running the sha256sum command and you get the hash. I already knew of the Python hashlib module but was unsure of how to implement it into hashing a file. After some Google searching, I came across a page that was exactly what I was looking for [2]. Here is the code:
# Python program to find SHA256 hash string of a file
import hashlib
filename = input("Enter the input file name: ")
sha256_hash = hashlib.sha256()
with open(filename,"rb") as f:
# Read and update hash string value in blocks of 4K
for byte_block in iter(lambda: f.read(4096),b""):
sha256_hash.update(byte_block)
print(sha256_hash.hexdigest())
Just for the sake of learning more, I asked ChatGPT how I would go about hashing a file in Python and it gave me an almost verbatim answer. I’m thinking either ChatGPT sourced its response from the page I found, or vice-versa. Either way, I got what I was looking for and learned a little bit about the process of hashing a file.
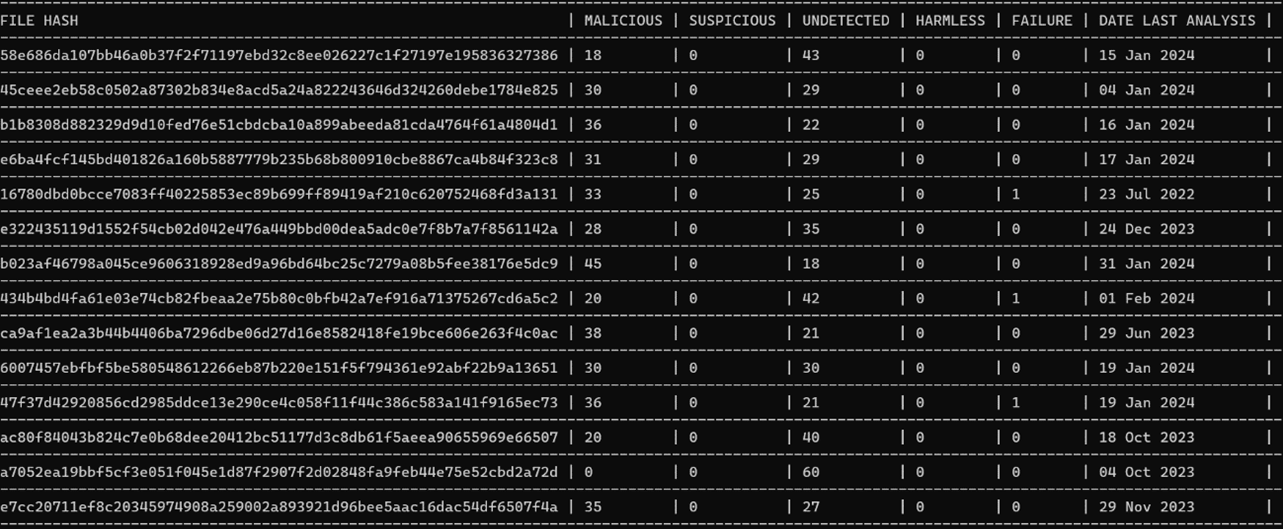
The output of this program is a simple database in the form of a CSV. Viewing it in the terminal is horrendous. Obviously transferring it out to a host machine is needed, either by scp or even nc, but I found it easy enough to copy/paste into a blank notepad, saving as a ‘.csv’ and opening in Excel (or CSV viewer of your choice). The results look like this:

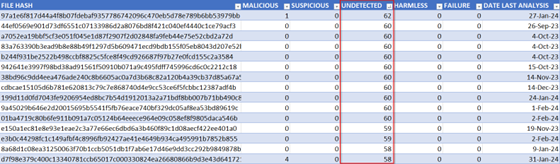
For times that I would like to stay in the terminal and to take a quick glance at the database, I added a function in the program to output a second plain text document that formats it in a way that is legible. There’s no sorting capability, and it may not be the best looking, but it is nice to have a quick way to pull up and review while investigating attacks without having to leave the terminal. There were a couple of different ways to get a csv to pretty print in the terminal, like Pretty Tables, but I liked the way this looked. It isn’t my code, however. I found it in a Stack Overflow post [3]. It looks like this:
Both scripts can be found on my Github:
https://github.com/ham-sauce/vt_cowrie
By the time I implemented this script in my DShield sensor, it had already been running for several months, so I had quite a few files that needed processed, roughly 160. At 4 queries a minute, it took about 40 minutes for the initial run. Once the initial database is made, running the script again will not take nearly as long. The way I have been using it is to periodically run it every few days. If it takes longer than an instant to complete, then I know there is something new added to the downloads directory (there is also an alert printed to the console stating which hash is being queried).
I really only scratched the surface of what can be done with the VirusTotal API. There is definitely room to refine this script, make it more robust and tweak it in a way to gather more data.
Next Steps: Simple Malware Analysis
Using the above output from the script, I want to try to find something interesting to investigate. I sort the list of files by ‘UNDETECTED’, as I feel that if a file is being reported as malicious, there are already plenty of analysis reports that I can look up.
In my case, many of these undetected files were not worth much more investigating, as many of them were simple ASCII text files containing one or two bash commands. But it’s a good starting point.
Static Analysis
I only do a couple of things in regard to static analysis, and I will accomplish this in the DShield terminal.
First, I will run the file command on the file of interest, getting something like this:
ELF 64-bit LSB executable, x86-64, version 1 (SYSV), dynamically linked, interpreter /lib64/ld-linux-x86-64.so.2, missing section headers
And then I will run the strings command. Which rarely gets back anything useful, but sometimes there will be a string or two worthwhile. Like the following:
$Info: This file is packed with the UPX executable packer http://upx.sf.net $
At this point, I will move the file to an analysis virtual machine, either FlareVM or REMNUX. To do this somewhat safely, I like to zip it and password protect it like so:
zip --password infected mal.zip </path/to/file>
And then scp it to my host of choice.
Dynamic/Behavioral Analysis
When I first started this post, I really wanted to get my hands on Mockingbird from Assured Information Security. [4] It is an automated malware analysis environment based off the Cuckoo Sandbox. I had used it at my previous job, and it is extremely easy to use. It comes pre-configured; all you must do is load it up in either ESXi or VMware Workstation. According to the data sheet, they have an evaluation copy available, but unfortunately the company never got back to me.
The official Cuckoo Sandbox is no longer supported. However, there are several forks available such as cuckoo3 [5] and CAPEv2 [6]. Setting either of those up is a bit of an undertaking, not for the faint of heart. I ran into issues that I couldn’t resolve in a timely manner, and it all seemed a bit out of scope for what I was trying to accomplish, so I abandoned this idea.
There are numerous web-based automated malware analyzers out there. Unfortunately, most of them only support Windows executable, at least in the free tier. And with the DShield honeypot being Linux based, pretty much any malware uploaded to it is going to be an ELF executable or bash script. Surprisingly, as I was writing this, ANY.RUN [7] released a Linux environment to analyze malware.
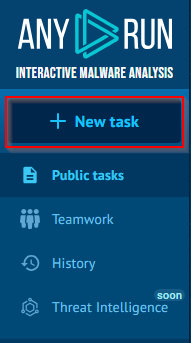
It is very simple to use. After creating an account and signing in, click the new task button:
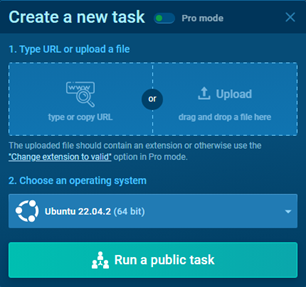
Drag and drop your file into the window and select Ubuntu:
The app will then run the executable in an Ubuntu virtual environment and generate a report for review. There are numerous indicators that can be further investigated, such as process information which includes command line arguments, file activity, and network activity like connections made or DNS requests. At that point, you could correlate some of this data with other attacks made against the honeypot and possibly find even more rabbit holes to go down.
Final Thoughts
This is obviously not a full deep dive into malware analysis. My goal was to create a simple process for myself to assist with researching the events taking place on my DShield honeypot. There is plenty of room for this grow, and there is so much information out there on doing proper malware analysis.
[1] https://virustotal.github.io/vt-py/quickstart.html
[2] https://www.quickprogrammingtips.com/python/how-to-calculate-sha256-hash-of-a-file-in-python.html
[3] https://stackoverflow.com/questions/52520711/how-to-output-csv-data-to-terminal-with-python
[4] https://www.ainfosec.com/rd/mockingbird/
[5] https://github.com/cert-ee/cuckoo3
[6] https://github.com/kevoreilly/CAPEv2
[7] https://app.any.run/
[8] https://www.sans.edu/cyber-security-programs/bachelors-degree/
-----------
Guy Bruneau IPSS Inc.
My Handler Page
Twitter: GuyBruneau
gbruneau at isc dot sans dot edu

Comments