DShield Sensor Setup in Azure
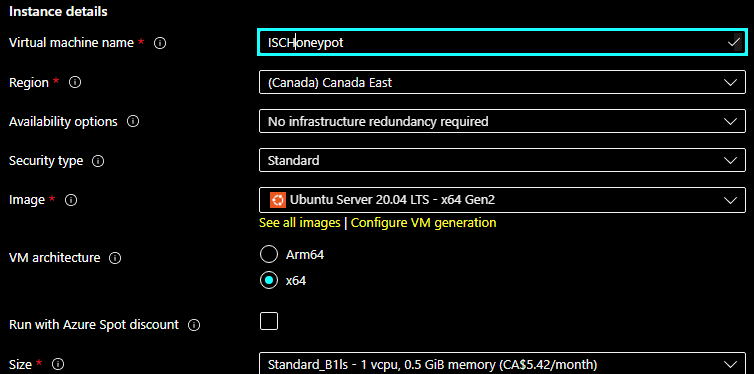
In November I setup the DShield sensor in my Azure tenant using Ubuntu version 20.04. Here are the steps I followed. First select and build the Ubuntu VM, I used the default disk size and 512 MB RAM:
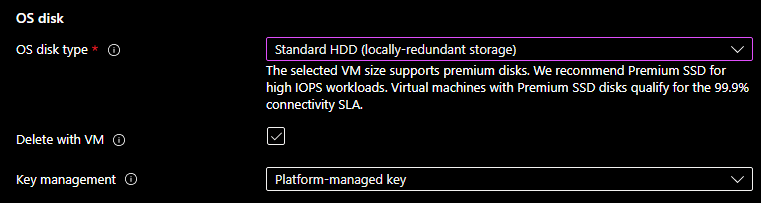
Since this isn't mission critical, I picked a standard hard drive
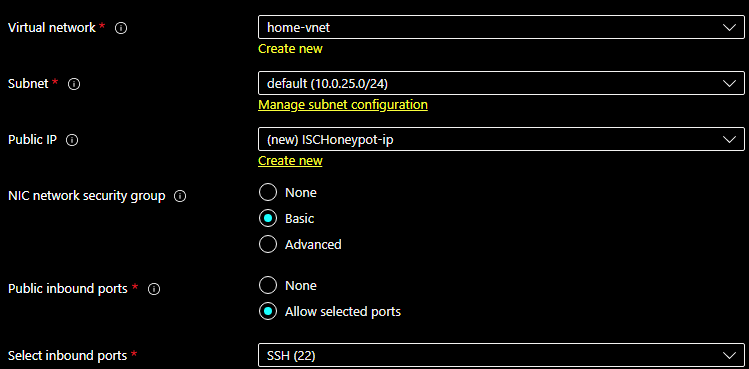
For Networking, Management, Monitoring I use the default and SSH for management which I will add later TCP 12222 for remote management.
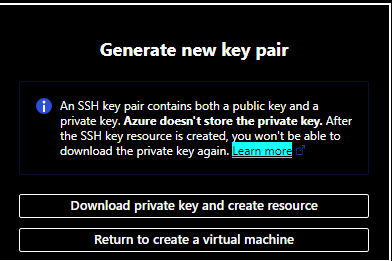
Last, Review + create to review what has been selected and if satisfied, Create the VM. At this point you will be asked to "Download private key and create resource" which is needed later to complete the sensor setup.
Building the VM
Accessing and Configuring the VM
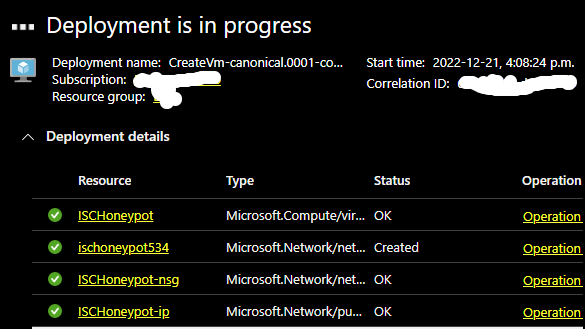
When Deployment is in progress is completed, select Go to resource to install and configure the DShield sensor.
First I need to find out what the IP of the VM is and that can be seen in the Overview or under Connect. To connect:
ssh -i <private key path> azureuser@XX.XX.XX.XX
At this point, follow the instructions listed in GitHub [2].
I have also installed these additional packages:
sudo apt-get install net-tools htop ntp bind9-utils vim
→ Login into isc.sans.edu and to get your assigned API Key by login into DShield and selecting My Account this is needed during the sensor setup. When the setup is completed, the script is will show this message: "Please reboot your Pi now." (sudo reboot) to restart the VM.
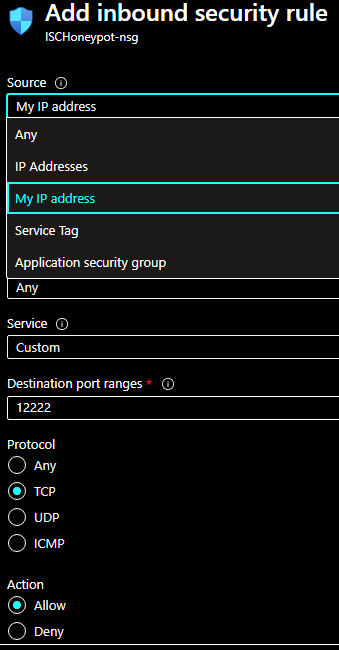
After the sensor reboot, next step is to add a rule to be able to SSH to TCP 12222 to manage the sensor and access the logs. Select Connect (Add inbound port rule) and add a rule with your home IP and TCP 12222:
If you are planning to use Windows 10/11 to ssh to the sensor, check this diary [6] for OpenSSH file locations and storage of SSH keys. Now we are ready to login in the sensor to TCP 12222:
ssh -p 12222 -i <private key path> username@XX.XX.XX.XX
Azure Specific Additional Firewall Configuration
My first installation of the DShield sensor, I had not foreseen that my ISP IP would eventually change and I would loose access to the sensor since it uses the home static IP during the firewall setup. Later I resolved this issue with a script; every 30 minutes would check my hostname, get my current IP and compare it against the IP configured in the firewall. If the IP had changed, then it would update the firewall and restart the sensor.
IPTables Script
$ sudo mkdir /root/scripts
$ sudo nano /root/scripts/check_home_ip.sh
$ sudo chmod 755 /root/scripts/check_home_ip.sh
$ sudo crontab -e
→ Copy and paste cronjob information and save
# Cronjob to check IP every 30 minutes
*/30 * * * * /root/scripts/check_home_ip.sh > /dev/null 2>1&
→ Copy script to check_home_ip.sh
→ Change in the script -> hostname.com <-
⇒ Start of Bash script
#!/bin/sh
# Guy Bruneau
# Date: 21 Dec 2022
# Version: 1.0
# Test and use this free script at your own risks
# https://www.gnu.org/philosophy/free-sw.html
# /var/spool/cron/crontabs
#
# sudo mkdir /root/scripts
# copy script to: /root/scripts
# make script executable: chmod 755 /root/scripts/check_home_ip.sh
# Add the following to the root crontab
#
# Cronjob to check IP every 30 minutes
#*/30 * * * * /root/scripts/check_home_ip.sh > /dev/null 2>1&
SEEKER=`/usr/bin/host hostname.com | /usr/bin/head -1 | /usr/bin/awk '{ print $4 }'`
# Get current IP
CURRENT=`/usr/bin/cat /etc/network/iptables | /usr/bin/grep 12222 | /usr/bin/tail -1 | /usr/bin/awk '{ print $6 }'`
# Change the current IP with the current home address IP
# Do a if then rule to check the current IP against the hostname.com IP
if [ $CURRENT != $SEEKER ]
then
echo "Update to the new home IP address in the firewall"
/usr/bin/sed -i "s/$CURRENT\b/$SEEKER/g" /etc/network/iptables
else
echo "No changes...."
exit 0
fi
# Reboot the sensor to set new home address IP
echo "Rebooting sensor....."
/usr/sbin/reboot
⇒ End of Bash script
This completes the setup.
DShield Sensor Logs Location
The DShield logs are in the following locations [5]:
- Uploaded files: /srv/cowrie/var/lib/cowrie/downloads
- Log files: /srv/cowrie/var/log/cowrie/
- Session Logs: /srv/cowrie/var/lib/cowrie/tty
- Database logs: /srv/www/DB/webserver.sqlite
Checking Sensor Status
$ sudo su cowrie
$ whoami
$ /srv/cowrie/bin/cowrie status
$ /sqlite3 /srv/www/DB/webserver.sqlite → SELECT * from requests LIMIT 10;
[1] https://isc.sans.edu/howto.html
[2] https://github.com/DShield-ISC/dshield
[3] https://isc.sans.edu/honeypot.html
[4] https://cowrie.readthedocs.io/en/latest/README.html#files-of-interest
[5] https://cowrie.readthedocs.io/en/latest/sentinel/README.html
[6] https://isc.sans.edu/diary/Linux+LOLBins+Applications+Available+in+Windows/29296
-----------
Guy Bruneau IPSS Inc.
My Handler Page
Twitter: GuyBruneau
gbruneau at isc dot sans dot edu


Comments